Полное прохождение pillars of eternity 2: deathfire
Содержание:
Тайная комната и завершение задания
После победы над крабом идите направо, и там будет дверь, в которой есть два отверстия в форме предметов, подозрительно напоминающих Корнеты. Здесь понадобятся оба, иначе дверь не откроется. Внутри вы найдете много полезного лута, в числе которого – уникальный щит из адры и уникальная алебарда.
Разграбив святилище, возвращаемся ко входу в Старый город и говорим с Гвенфин. После этого идем к Дерео и рассказываем, что миссия прошла успешно. Как и в начале задания, рекомендуется использовать специальную диалоговую опцию (Проницательность 4 / Блеф 6 / История 7) и спросить, для чего это все было нужно и почему он так заинтересован в Старом городе. После этого вы получите награду – уникальный мушкетон «Кухонная печь». Также вы можете использовать Знание улиц 4 или Дипломатия 4 и получить дополнительные 200 монет за свои старания.
Walkthrough[]
Go to the cave in the east part of Dyrford Crossing. The ogre Korgrak is very temperamental, and many dialogue options will result in him attacking you. In order to resolve the conflict peacefully, you must ask him why he’s living in the cave, then tell him it’s dangerous, and that even if he kills you, more attention will be brought on the ogre. You can convince him to leave (Eder will mention Twin Elms), advise that he lie low for a while, suggest killing Rumbald, or invite him back to your stronghold. This will unlock him as a hireling.
Rumbald will not be happy if you deal with the ogre peacefully, only giving you a Piglet for your trouble. If you reimburse him for the cost of his herd (400 ), he will be much happier, and give you his unique blunderbuss Lead Spitter. On the other other hand, if you sent Korgrak after the farmer, his wife takes his place in front of their home, and gives you a piglet instead.
If you do get in a fight with Korgrak, be very careful about who goes into melee; the ogre does massive amounts of damage. Try taking advantage of his low reflex and will defenses to incapacitate him, or charm/dominate some of his bears to take the blows for you. It is also possible to use pull and run strategy, killing bears at first and then Korgrak.
Interaction with Korgrak:
- He is extremely easy to aggravate.
- You may ask about lost elf noblewoman.
- You may ask about the pigs.
- You may ask about the piles of bones.
- Ask him what he’s doing in the cave:
- Perception 16 — Notice he’s favoring one leg — he becomes hostile
- Survival 9 — Mention that he already ate whole herd of pigs, and won’t be able to hide for long.
- Intellect 18 — Say that he’d only hole up in a spider infested cave if he feared something.
- Being Rational — allows you to parley and guide him or recruit him.
- Otherwise there will be blood…
11 Один монах
Для другой сборки одного класса, для выполнения которой не требуется слишком много математики, этот монах-одиночка будет доминировать в поздней игре с простота. Прокачка в начале и в середине игры может быть немного грубой, но отдача того стоит. Просто сосредоточьтесь на атакующих способностях монаха и на тех, которые дают тонны скорости атаки от навыков, упомянутых ниже.
- Класс: Налпаска (монах)
- Приоритетные характеристики: Восприятие, Решимость, Ловкость.
- Оружие: Безоружный Кулак, Ладонь Тутило
- Головной убор: Пасть Смерти
- Нашейник: Защитный эотазийский амулет
- Доспех: Кираса дьявола Карока
- Кольца: Перстень Энтонии, Кольцо одинокого странника
- Сапоги: Каменные сапоги
- Пояс: Тупой пояс
- Наконечник: Рукавицы меткости
- Накидка: плащ отражения
Эти заклинания являются наступательными по своей природе, но гарантируют, что у врагов не будет шанса:
- Swift Flurry
- Heartbeat Drumming
- Stunning Surge
- Возвышенные мучения
- Удары грома
- Вращающееся колесо
- Зеркало души
- Укоренившаяся боль
Общая боль
Резонансное прикосновение
Внутренняя смерть
Шепот ветра
Interactions[]
| This character is involved in quests. |
Quests
Lord of a Barren Land: You meet him at his throne room depending on your previous actions while at Raedric’s Hold:
- If you previously met Kolsc and took part in his plans to bring down Raedric VII he will address you as a pawn of Kolsc and open lots of different options for you to choose and learn more about the conflict.
- If you SNEAKED all the way up to Raedric he will act surprised at your infiltration skills (Also there will be 1 Champion of Berath less to fight).
- If you had a couple of fights he will comment on your strength and skill.
- If you made your way via the front gate and killed either Osrya or the Captain of the Guard, he will comment that he was expecting an army (Also there will be 1 Champion of Berath more to fight).
- If you are Godlike Race he will comment that you are a chosen of Berath and question Kolsc intentions.
- If you are either a Dwarf or an Orlan he will be amazed that you were able to made your way to the throne room.
- If you have a Adventurer/Mercenary/Raider background he will comment on Kolsc army.
- If you have Perception 12+ you can comment some elements around the throne room.
- If you examined the body laying on a bed near the throne room you can comment on his cruelty.
- If you are a Priest of Eothas and cleared the Temple at Gilded Vale you can comment on his actions and repercussions. This will enrage him and he will attack you.
- If you are a Goldpact Knight Paladin you may immediately change sides with Raedric asking for a better reward on Kolsc head.
- If you are a Darcozzi Paladini Paladin you can criticize his actions and attack him immediately.
- After this conversation you can either ATTACK him or JOIN him. Depending on your conversation the reward for Lord of a Barren Land will slightly change.
- Raedric will ATTACK you immediately if you have BAD reputation on Gilded Vale and massacred everyone at the castle (killing him with yield a MODERATE GOOD reputation at Gilded Vale ).
- If you avoided Kolsc
If you infiltrated and made a deal with Osrya you may tell him that you are on his side.
and either infiltrated/fought your way through the hold he will act surprised to see you.
- The Champion of Berath: Killing Raedric will trigger this quest, available once Twin Elms are unlocked.
History[]
The legends of Ondra are old compared to those of the other gods, and tales of her romance with the moon are especially well-known. In the stories, Ondra attempts to touch the moon but grasps only a piece of it, which plummets into the ocean. Its catastrophic impact causes the earth to shudder and the seas to surge all over the world. Ondra still pursues the moon, which kith believe causes the tides. Tidal waves and tsunamis are a result of her more forceful advances.
Ondra is one of the few gods that doesn’t have a physical shape in legends and she is never known to speak. She is imagined as a goddess who listens without judgment. As such, many use the seas as a confessional. «Ondra’s Hair» are long, shifting pillars of water that appear on the surface of oceans. They are the most direct manifestation of Ondra, and people believe they serve to thwart and punish plunderers of the sea.
In reality, Ondra was one of the gods created by the Engwithans. As the master of forgetting and the only one determined enough to handle the task, she sought to destroy the Engwithans to prevent them from ever threatening the gods with their refinement of animancy. This would be the last intervention before the gods swore off direct involvement in the affairs of the kith. To achieve this, she pulled Ionni Brathr, the smallest of Eora’s moons, down from its orbit such that it would impact the Eastern Reach and Deadfire Archipelago, centers of Engwithan civilization. However, Abydon interfered with her plans. He forged a hammer that shattered the moon, causing most of its fragments to crash into the ocean. However, the largest shard remained on course. He threw himself in its path, sacrificing his life. Ondra honored his memory by erecting the Abbey of the Fallen Moon around his body, which lay in the mountains of the the White March.
Interactions[]
Pillars of Eternity
| This character is involved in quests. |
The Phylactery’s Promise: Her dragons, Gafonercos and Turisulfus, acknowledge the Watcher’s strength if he/she killed Sefyra, the Master Below, and are eager to defeat them in battle. The quest can also be completed in a nonlethal way if the player passes a 16 Intellect dialogue check or has Honest 2+/Stoic 2+ reputation or sufficient resolve. Llengrath can be convinced to form a pact with the protagonist, where she will gain knowledge about souls (a Watcher’s knowledge) and the Watcher will receive a permanent bonus to +1 INT/PER/RES. Also, the player receives Bog dragon scales and +5 security to their stronghold. If you slay her and her dragons instead, you get +15 prestiege, Llengrath’s Grimoire, and more bog dragon scales. Be warned though, as it’s arguably the hardest battle in Pillars of Eternity.
The Forgotten Sanctum
| This character starts quests. | ||
| This character is involved in quests. |
Hidden DepthsAnnotated HistoryUnder ObservationThe Seeds of Deception |
На мели
 На мели
Задание активируется тут же после высадки на Маже. Для его завершения следует отправиться в одноименный порт неподалеку и послушать, о чем беседуют губернатор Кларио и уана Икава.
Когда разговор завершится, посетите Кларио в его особняке, что находится на севере порта. Расспросите его обо всем, а затем потребуйте помощи.
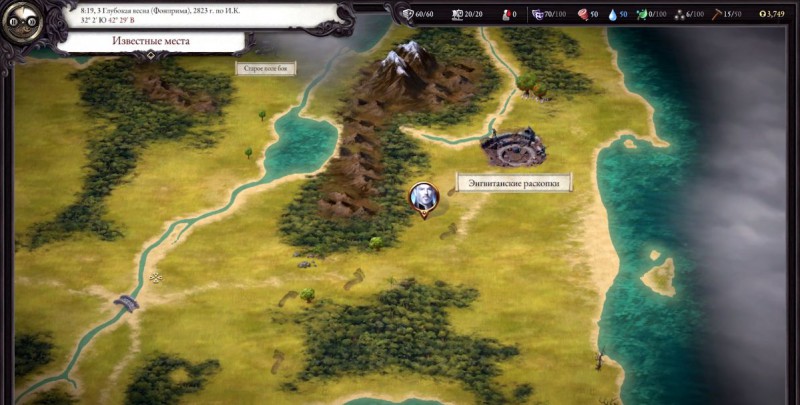
На месте раскопок вы попадете в засаду. Разберитесь с пантерами, а затем активируйте дверь, за которой прячутся рабочие.
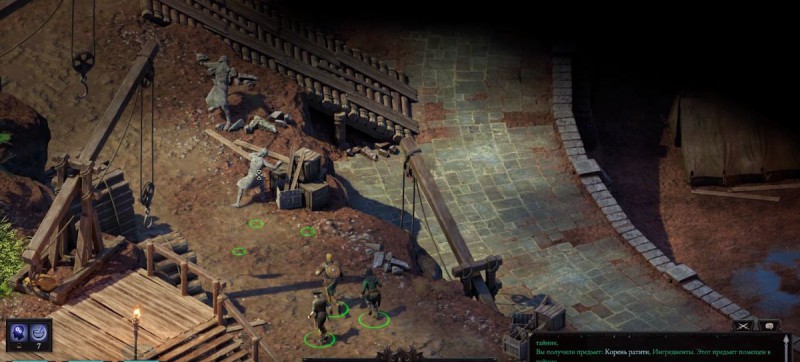 На месте раскопок
Бенесса откроет вам местонахождение Одериси, с кем вам и нужно поговорить. Также здесь вы обнаружите Алота – спутника с собственной историей, какого можно принять в отряд.
Одериси находится в основном подземелье. Чтобы попасть туда, двигайтесь вправо от клетки с рабочими. Внутри необязательно изучать все, поэтому вы сразу можете отправляться в левую сторону, чтобы миновать полный врагов зверинец и столкнуться с аномалиями сущности.
 Поисках Одериси
В помещении слева вверху находится оружейная Одериси. Внутри ликвидируйте противника и исследуйте комнату на предмет ценных вещей.
В дневнике хозяина вы узнаете, что идти нужно в зал, что лежит за Столпом Вечности наверху локации. В конечном счете Одериси откроет вам свои наблюдения. Начнется кат-сцена.
 Покидаем Энгвитанские раскопки
После этого вы можете оставить подземелье и навестить Кларио в порту. Перед вами окажется выбор: передать ему записи Одериси, тем самым возвысив себя в глазах местных, или же оставить документы себе.
Также на данном этапе у вас появятся новые варианты в диалоговом древе, если вы принадлежите к классу паладина, священника, следопыта или монаха. Кроме того, вам станет известно о Некитаке, которую необходимо навестить для продолжения квеста «Жилы Эоры».
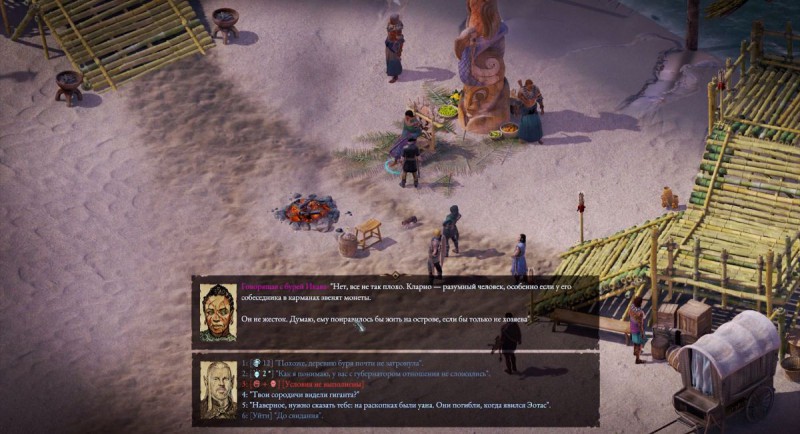 Говорящая с бурей Икава
Ступайте к берегу у лагеря Виларио. Здесь вы повстречаете Икаву и сможете восстановить корабль, чтобы отправиться в плавание. Наконец, вам вручат несколько вторичных квестов, связанных с поиском ресурсов для обеспечения длительного морского приключения.
Organization[]
Lady Eydis Webb is the head of the agency. Though no one seems able to pinpoint the time of her arrival, nobody can remember a time when she wasn’t around. Many things are hinted at behind closed doors about Lady Webb, but few are willing to elaborate, as she is a cipher of tremendous power, and supposedly she can read the thoughts of the entire city at will. Theories abound regarding her age, her reasons for what would seem to be a lifetime of seclusion, and even of her secret control over all of Defiance Bay, if not Dyrwood itself. But as with all other matters regarding the organization, no one seems to be able to say anything for sure.
The Lady herself states in no uncertain terms that she considers the knowledge gathered by the Dunryd Row to be the Dyrwood’s standing army in many ways, allowing Dyrwoodans to sleep peacefully while the Row works tirelessly to preserve that state of affairs.
14 Воин/Монах Бледный Рыцарь
Заблудший грешник — тот, кто отвечает за эту сборку, и он/она называет его Бледным рыцарем. Это классический стиль игры — большое двуручное оружие, в котором персонаж будет в центре внимания и будет сиять в авангарде любой схватки. Лучше всего использовать для этого двуручный меч, так как это создает дополнительный фактор устрашения и эстетичный вид. Рассекающая стойка обязательна здесь вместе с Swift Flurry и Avenging Storm.
- Класс: Преданный (Боец)/Hellwalker (Монах)
- Приоритетные характеристики: Восприятие, Ловкость, Телосложение
- Оружие: Шепот бесконечных путей
- Головной убор: Какофония Небес
- Нашейник: Амулет костей
- Доспех: Наследие Каситы Самелии
- Кольца: Сенсорное кольцо Хамелона, Кольцо с печаткой Энтонии
- Сапоги: Каменные сапоги
- Пояс: Собственная сила Создателя
- Наконечник: Болтоловы
- Накидка: Плащ Великого Отражения
Manifestations[]
Woedica is usually depicted with burned and withered skin, having been cast from her rightful seat by war and burned in Magran’s fire. Nevertheless, she retains her dignity and plots her «rightful» revenge. She has no allies among the other gods, believing they owe her fealty. However, Skaen is associated with her, though the exact nature of their relationship is unclear.
Woedica manifests in the world as the Strangler, a leathery-skinned old woman, always clad in tattered finery, who appears on an empty road or abandoned alleyway to murder those who break a solemn oath. According to those few that claim to have seen her, she is supernaturally agile and quick while possessing the strength to strangle a full grown aumaua. Woedica’s avatar is believed to have slain several usurpers in Dyrwoodan history, though it is possible that the real murderers merely blamed the goddess. For this reason, oath breaking is punished by strangulation in many cultures.
Грядущая буря
 Грядущая буря
Эотас устремился к землям Укайзо – вы должны настичь его. В ходе этого квеста вам предстоит выбрать одну из фракций, на сторону которой вы встанете.
В пути садитесь на корабль и плывите на северо-восток карты вплоть до бури. Необходимо преодолеть стихию, чтобы загадочный остров Укайзо открылся вам.
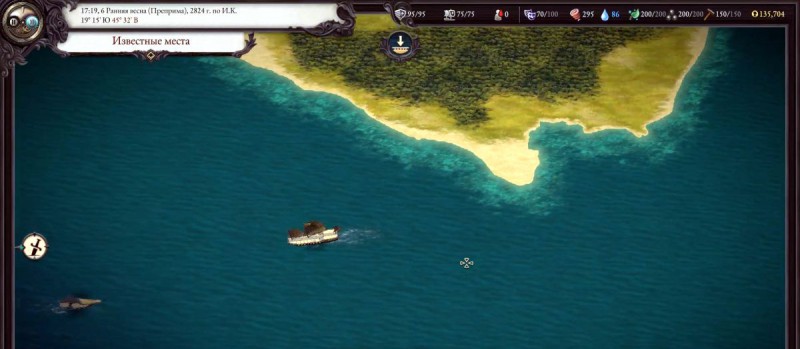 Отправляемся в плавание
Для одиночного путешествия вам придется установить на корабль паруса из крыльев дракона и обить корпус черным деревом. Все это можно приобрести в порту Некитаки у корабела.
Так или иначе, после выбора вы должны поговорить с новым капитаном, который откроет вам местонахождение уникального призрачного корабля. Используя его, вы легко сможете миновать бурю.
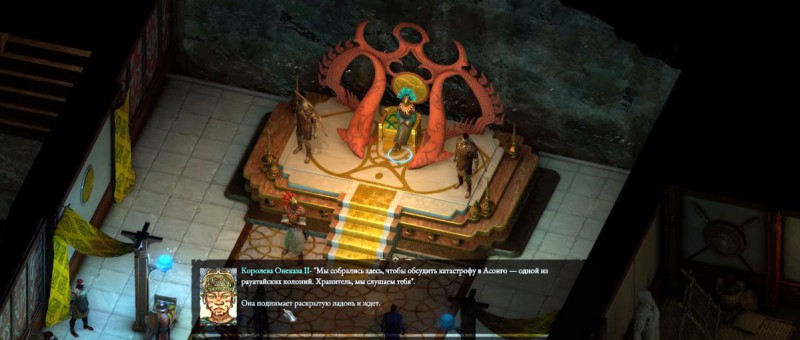
Предпочтя королеву Онеказу II остальным, отчитайтесь перед ней во дворце. Женщина отправит вас уничтожить хранилище с порохом текущей торговой компании, подставив тем самым их конкурентов – Вайлианскую компанию. Если вы сделаете это, королева отправит с вами в путь двух магов воды, что развеют бурю.
 Королева Онеказа II
Что касается Вайлианской торговой компании, то при ее выборе вам сперва предстоит решить вопрос с верхушкой. Кто займет место главы – текущий директор Кастол или претендент Альвари. По итогу убивать никого не придется, однако вас все равно попросят встать на чью-то сторону.
Наконец, если вы выберите компанию Архипелага, то тогда вам придется выполнить нелегкое задание по убийству королевы Онеказы II. Можно также не трогать ее и прикончить лишь принца.
Предложение, от которого нельзя отказаться

Этот загадочный незнакомец расскажет вам, куда именно нужно идти и что нужно делать для того, чтобы встретиться с его загадочным нанимателем. Направляйтесь в Теснины, где начнется постановочное взаимодействие, примерно такое же, как в задании «Гнилой ряд». Выбирайте «пойти налево», затем «направо» и еще раз «направо». Там вы встретите бандитов, но в этот раз вместо того, чтобы убивать их или платить им, скажите, что вы хотите увидеться с Дерео. Тогда вас отведут к нему, и после небольшого разговора он предложит вам работу – добыть Корнет Волн, артефакт большой ценности и непонятного назначения.
Cult[]
The cult of Ondra takes on many forms, the most noticeable of which are Ondra’s Giftbearers. They are a group which collects trinkets, love notes, and other objects from people that live far from the sea in exchange for a small fee. These objects are then cast into the ocean or dropped in a particularly deep spot during a special ceremony. There have been some cases of Giftbearers abusing their responsibility, which led to them being mistrusted or even attacked in some areas.
Of note is the secretive Abbey of the Fallen Moon, a remote cloister in the White March. Unknown to all but the highest ranking members of the cult and Giftbearers, it is built around the corpse of Abydon, the smithing god. It houses both the Salt Well, where the greatest burdens are forgotten, and the orders of High and Low Tides: the most revered ranks of Ondra’s faithful, dedicated to memory and forgetting. The order of the High Tide is responsible for the day-to-day operations and defense of the Abbey, as well as preparing for the Low Tide’s vows. The Low Tide is composed of Giftbearers who inhabit the Halls of Silence beneath the Abbey, where they submit to slow erasure of memory. Ultimately, they are sacrificed in the ritual of the Rising, where the Tidecaster selected by the Conclave arrives to drown them all and allow members of the High Tide to take the vows and inhabit the Halls below. Notably, many members of the Low Tide later regret their choices and the slow disintegration of their minds. Thus, the ritual is designed to prevent them from ever leaving the confines of the Abbey and revealing their secrets to the world beyond.
Rituals
The ritual of sprinkling holy water is one of the most important traditions in the Ondrite church. For Ondra’s followers, it signifies not only a sanctifying of the church, but the actual presence of the Lady of Lament herself. All Ondrite holy water comes from the ocean, and those pilgrims who convey the water from the sea are held in great esteem among Ondra’s faithful.
Journal[]
| quests\companions\companion_qst_durance | |
|---|---|
| ID | Objectives |
| The Trials of Durance | |
| 10000 | I met a strange priest in Magran’s Fork who claims we have something to gain from questioning one another. |
| 1 | Spend time traveling with Durance. |
| 10001 | Durance says he and I are meant to travel together, and that we can teach one another. He is a man of many words who seems to raise more questions than he answers, but if I travel the road long enough with him, perhaps I may discover something worth learning. |
| 2 | Discuss your vision with Durance. |
| 10002 | I had a dream about Durance. My eyes seemed unable to focus on him, and a blinding light burst from his staff. Something about the dream seemed all too real — as though something in his soul was revealing itself to me. I should ask him what I saw. |
| 3 | Continue to get to know Durance. |
| 10003 | Durance revealed to me that he was one of the engineers of the Godhammer bomb. There must be more to this that he isn’t telling me — at least not yet. |
| 4 | Find out from Durance what the fading symbols meant. |
| 10004 | I had another dream about Durance. I saw a burning symbol on his staff — a circle of twelve smaller circles, and as I watched it, eleven of the twelve faded out. In my dream Durance seemed to try to rekindle them, but it was no use. Perhaps Durance will know what it meant, as he did with the last dream. |
| 5 | Continue to journey with Durance. |
| 10005 | Durance was evasive when I asked him about the fading circles on his staff. He claimed it represented his lost connection with the other engineers of the Godhammer, whom he left behind to follow his own path after the destruction of Eothas. When the time is right, I’ll see if there isn’t more to be learned about this. |
| 6 | Talk to Durance about Woedica. |
| 10006 | Learning that Woedica is responsible for Waidwen’s Legacy leaves many questions about the circumstances of the Saint’s War and the destruction of Eothas. Durance may have further insight. |
| 20000 | Durance was unsettled in discussing Woedica’s plot and the death of Eothas. It seems probable that Magran would’ve been in league with Woedica, given that the Godhammer was Magran’s work. But Durance still seems to be in denial. If I can make that case to him using his own words as my evidence, I may be able to break Magran’s hold over him. |
| End states | |
| Completed | |
| 30000 | I was able to get Durance to see that Magran had conspired with Woedica in creating the Godhammer, and that her refusing to speak with him wasn’t because he had wronged her, but rather was because she had intended him to die with the other Godhammer engineers, in order to keep secret her direct involvement in Eothas’ destruction. Though it appears this alliance between the goddesses was short-lived, it sheds new light on the Saint’s War and the epidemic of Hollowborn infants that followed. Durance, for his part, has renounced his goddess and sworn revenge. As a man who’s killed one god already, it would seem that he might be one of the only people alive who could make good on such a threat. |
| Failed | |
| 30001 | Durance has died. |
| Failed — Too Late | |
| 30002 | This matter can no longer be resolved. |
Walkthrough[]
You get this task after you finding an edict of arrest for Eorn in Crucible Keep. Alternatively, you may begin this task by locating Eorn without having to find the letter. You can find Eorn in the Catacombs under Copperlane. Decide Eorn’s fate. Report to Justiciar Aldmar at Crucible Keep.
Solutions:
- Kill Eorn: Eorn’s corpse yields his Rabbit Fur Gloves. Justiciar Aldmar awards 200 upon reporting Eorn’s death and an additional 50 if pressed further.
- Attempt to arrest Eorn: Eorn will attack the party to the death if you attempt to arrest him to face the duc’s justice.
- Find and report Eorn’s location to the Crucible Knights: Justiciar Aldmar awards 200 upon reporting Eorn’s location and sends a party to kill Eorn. Eorn’s corpse is left in the catacombs along with his Rabbit Fur Gloves.
- Help Eorn leave Defiance Bay: You can give Eorn 300 to escape Defiance Bay. Eorn rewards you with his Rabbit Fur Gloves and departs. You can encounter him later in Dracogen Inn and get Dyrford Village minor positive after you talk with him.) This option grants benevolent disposition.
- Take Eorn prisoner: Eorn will be locked up in your stronghold dungeon. This option is only available if you have constructed the Dungeons at your stronghold.
References[]
- «Player’s observation from first dialog, «At first glance, she seems nothing more than a middle-aged woman, unremarkable, maybe less stern than most».
- GM’s own words from first dialog: «My face… is like the caul of a newborn, hiding the face beneath, and for my body… I am able to wrap myself as a mother cradling her child. I am here, as you see me, but to them, their eyes see only the cloak that I wear, a peasant mother, dirty, shabby, not worth knowing.»
- Hiravis almost notices her during one companion banter: «»Well I was wondering how long you’ve been… oh forget it. Probably no big deal.»»
- Eder refers to her as «nice stranger lady» during Fragments of a Scattered Faith
- If GM leaves the party, Hiravias will comment: «Oh… right… the peasant woman that’s been traveling with us?»
- When asked why she has her name, GM says: «»That is a question for you, not I. That is not my name, although if you wish to hang the title on me, I cannot stop you. Is that what you see when your eyes fall upon me?» and «As a Watcher, you may see what I do not. Or your mind shapes the thoughts I project into a new meaning…there is truth in that title, but it is not all I am.»
- GM later describes this location: «The Birthing Bell lies deep in the great forests of the Dyrwood, at the borders of Glanfathan lands. Surrounding it… barely a town, not one you would find on any map.»
- GM’s words about The Birthing Bell: «In distant times, the great bell served as a Glanfathan… watchtower, perhaps. Why they abandoned it, I do not know. Other men came in time, settlers… and claimed the tower as their own. I, in turn, claimed it from them. The pillar became a cradle where I could draw new souls into the world.»
- GM’s own words: «I was something else, but because the title ‘Watcher’ was cast on me, the word carried a weight I had neither earned nor deserved.»
- GM’s own words: «I… drew upon the present. I felt the soul of the mother before me and used that to tell the child’s path, to give it a voice.»
- GM’s own words: «…futures fulfilled by one’s own spirit are as strong as anything seen by another’s eyes. And if one draws from the emotion of the mother… It… matters only when harm is done.» and «And their lives I knew well. I could weave their lives, their thoughts over time — to the mother, to the child — and once the child had been born, was sheltered… I could relax the threads of thought until the child could stand on its own.»
- GM gives all these reasons for her actions: «I could not understand what had happened. What I might have done. I feared I… no. I could not dwell on that thought.» and «Little word of the outside world reached us. It was enough time for rage and pain and grief to guide hands… I feared what would happen to the children… what would happen to me…»
- GM admits her actions: I made her care for it. I made them all care for it… until I could find what I had… what had gone wrong.
- GM on her illusion breaking: ‘«I… held their minds within mine. I shaped and guided them as long as I could. And with each passing day, each new birth, the strain grew. And the more I felt my control slipping, the more I focused my thoughts. Eventually, even I succumbed to the power of my own illusion. I’d woven the threads so tightly that I could no longer see through them.» and «then one morning, I heard funeral bells tolling in the village. The sounds of wailing rose through the mists. A mother had died, her mind so focused on the care of her Hollowborn child that she’d neglected even to feed herself. And with that, the illusion broke.»
- https://forums.obsidian.net/topic/78683-cut-content-durance-and-grieving-mother