Bloodmoon:werewolf
Содержание:
- Служение Храму Альмалексии
- Tribunal Temple Ranks[edit]
- Bears[edit]
- Character Information
- Tips[]
- Horkers[edit]
- Finding a Werewolf[edit]
- Начало Испытаний из Легенды о Нереварине
- Rieklings[edit]
- The Transformation[edit]
- Contents[]
- History[]
- Portal Battle Mode
- Trivia
- Quick Walkthrough[edit]
- Восстановление Клинка Неревара
- Notes[edit]
Служение Храму Альмалексии
После разговора с Барензией вы завершите выполнение заданий Монархии и приступите к поручениям Храма, которые будете получать от Федриса Хлера, находящегося в Приемной Храма.
Угроза нападения Армии Гоблинов
Хлер полагает, что король Хелсет в тайне от храма готовит армию гоблинов. Ваша же задача найти и уничтожить предводителей этой армии. Помимо всего прочего, Хлер намекнет на то, что было бы неплохо разобраться и с двумя альтмерами, которые выступают у гоблинов в роле учителей. Альмалексия, по его словам, будет приятно удивлена такими результатами зачистки.
Отправляйтесь в Годсрич. Через Канализацию жилого района следуйте в Западную Канализацию. В юго-западной ее части расположен проход на Поле боя. Вам необходимо найти здесь вход в Городские врата старого Морнхолда (южная часть Поля боя). Далее двигайтесь в юго-восточную часть Руин Арсенала. Там вы найдете проход в Слезы Амун-Ша. В этой локации находятся два предводителя гоблинов: Дургок и Кургок.
Разобравшись с предводителями гоблинов отправляйтесь в Руины жилых зданий. Вход туда вы найдете в локации Слезы Амун-Ша. Учителя гоблинов альтмеры Ярнар и Армион находятся в Залах Терана (восточные помещения). Покончив с неприятелями возвращайтесь к Федрису Хлеру.
Освящение Алтаря Мертвых
Федрис Хлер сообщит, что Гавас Дрин желает видеть вашу персону у себя. Благо вход в его кабинет расположен совсем рядом, в западной части Приемной Храма.
Архиканоник попросит выполнить задание Альмалексии. Нужно освятить древнее святилище под названием Алтарь Мертвых, которое уже бог знает сколько лет никто не посещал. Альмалексия полагает, что это святилище можно использовать в своих целях. Однако для этого нужно избавиться от захватившей его нежити и произвести обряд очищения, тем самым восстановив силу древнего поприща. Освящение Алтаря Мертвых происходит в два этапа.
Зачистка нежити
Отправляйтесь в северную часть Зала Духовенства. Оттуда через люк в полу спускайтесь в Канализацию Храма. Здесь необходимо найти вход в восточную часть Канализации. Оказавшись на месте, двигайтесь по восточному коридору, который затем плавно повернет на север и приведет вас ко входу в локацию Сад Храма, на юге которого вы найдете проход к Алтарю Мертвых. Зачистите эту местность от всех темных прислужников до появления соответствующей записи в дневнике, после чего возвращайтесь в Храм за Урвелом Дулни.
Сопровождения Урвела Дулни к Алтарю Мертвых
С этим проблем возникнуть не должно. После зачистки Алтаря от темных приспешников, возвратитесь в Храм и поговорите с Дулни, а затем по старому изведанному на первом этапе пути, проведите его к Алтарю Мертвых. После того как Дулни очистит алтарь, а вы получите запись в дневнике, возвращайтесь в Храм к Гавасу Дрину и доложите об успешном выполнении задания. В награду вы получите Благословенное копье – древковое оружие со средними характеристиками (Колющий урон 5-32). После доклада Гавас снова отправит вас к Федрису Хлеру.
Поиски Ленты Лабиринта Барилзара
Поговорите в Приемной Храма с Федриком Хлером. Он сообщит, что Альмалексия довольна проделанной работой и в награду за потуги, готова дать еще одно поручение. Да не простое, а особенное. Вам необходимо найти для нее Ленту Лабиринта Барилзара.
Отправляйтесь в Зал Духовенства (пройти туда можно либо через кабинет Архиканоника, либо через больницу), а затем спускайтесь на нижние уровни Храма. Там найдите люк в полу, который приведет вас в Канализацию Храма. Вообще стоит отметить, что 80% игры проходит в шастаньях по канализации.
Спустившись в Канализацию Храма двигайтесь на северо-запад пока не наткнетесь на вход в Заброшенный склеп. Здесь нужно отыскать древнего лича Барилзара. Он расположился в северной части Заброшенного склепа. Как завелось, отдавать кольцо без боя он откажется, поэтому придется упокоить ходячий мешочек с костями. Забрав с его тела кольцо возвращайтесь в Приемную Храма к Федрику Клеру. Тот в свою очередь отправит вас к Архиканонику Гавасу Дрину. Вы найдете его в своем кабинете, пройти в который можно через западную дверь приемной.
Гавас Дрин сообщит о том, что Ленту Лабиринта нужно отдать Альмалексии, которая пребывает в Высокой Капелле. Попасть туда можно непосредственно из Офиса Архиканоника, либо из Приемной храма. Альмалексия в награду за переданный артефакт наградит героя способностью Свет Альмалексии (восстанавливает по 25 пунктов каждой характеристики).
На этом задания Храма в привычном их виде закончатся, а вам необходимо покинуть святилище Альмалексии и прогуляться по Морнохлу. Нет, не полюбоваться видами. Это необходимо чтобы начался следующий виток в сюжете.
Tribunal Temple Ranks[edit]
| Rank | Required Attributes | Required Skills | Required Reputation |
|---|---|---|---|
| 0. Layman | Intelligence 30 Personality 30 | — | |
| 1. Novice | Intelligence 30 Personality 30 | One skill at 10 | 5 |
| 2. Initiate | Intelligence 30 Personality 30 | One skill at 20 | 10 |
| 3. Acolyte | Intelligence 30 Personality 30 | One skill at 30 and two at 5 | 20 |
| 4. Adept | Intelligence 30 Personality 30 | One skill at 40 and two at 10 | 30 |
| 5. Curate | Intelligence 31 Personality 31 | One skill at 50 and two at 15 | 45 |
| 6. Disciple | Intelligence 32 Personality 32 | One skill at 60 and two at 20 | 60 |
| 7. Diviner | Intelligence 33 Personality 33 | One skill at 70 and two at 25 | 80 |
| 8. Master | Intelligence 34 Personality 34 | One skill at 80 and two at 30 | 100 |
| 9. Patriarch* | Intelligence 35 Personality 35 | One skill at 90 and two at 35 | 125 |
* Patriarch doesn’t actually require the listed skills and attributes, as the final promotion is automatically given from the final Temple quest, Ebony Mail.
Bears[edit]
Grizzly Bearedit
Grizzly Bear
- «Bears are but one of the sacred creatures the All-Maker has blessed us with. They embody the warrior’s strength, and some of the Skaal can even summon them to fight by their sides.» — A Skaal
Description: This dark red furred bear is the weakest to be found on Solstheim, but is nevertheless an impressive creature, much larger than the average adventurer, especially when standing up on its rear feet.Found: All over Solstheim in the woods as well as in some ice caves.
| Creature | Drops | Attacks | Soul | |||||
|---|---|---|---|---|---|---|---|---|
| Grizzly BearBM_bear_black | Bear Pelt | 150 | 1−5 | — | — | — | 100 (Common) |
|
| Grizzly BearBM_bear_black_summon(Created by the Summon Bear spell) | 200 | |||||||
| Grizzly BearBM_bear_black_fat(Legge) |
Ring of Wizard’s FireBear Pelt 2 x Human Flesh |
|
||||||
| Grizzly BearBM_bear_black_Claw_UNIQ | nothing | 50 | — | 50 (Lesser) |
Plague Bearedit
Plague Bear
- «Lots of them around this island. Some of them are pretty nasty, even diseased. Doesn’t pay to mess with them, though their pelts can be valuable, I hear.» — A guard at Fort Frostmoth
Description: Of similar size to the grizzly bear, this beast is more resistant against the surrounding nature than its cousin, and known to carry diseases.Found: All over Solstheim.
| Creature | Drops | Attacks | Soul | |||||
|---|---|---|---|---|---|---|---|---|
| Plague BearBM_bear_brown | Bear Pelt | 180 | 1-5 | — | — | 50 |
|
100 (Common) |
Snow Bearedit
Snow Bear
- «They’re big, and deadly! Their claws and teeth can freeze the flesh of an enemy.» — A drunkard at the mead-hall in Thirsk.
Description: This magnificent beast can only be found in a few locations on Solstheim. It is perfectly adapted to its cold habitat and must be feared for its brutal attacks.Found: Five locations in the Hirstaang Forest :
- In the snow-covered ground that runs southeast from the Sun Stone
- Same area as above, but further southeast
- At the southern tip of the large area of snow-covered ground, west of Fort Frostmoth
- Same area as above, at a small round patch of snow a little further west, near the stone arch
- At the edge of the snowy area west of Raven Rock
| Creature | Drops | Attacks | Soul | |||||
|---|---|---|---|---|---|---|---|---|
| Snow BearBM_bear_snow_unique(Hirstaang Forest, 4 locations) | Snow Bear Pelt | 300 | — | −50 | 20 | — |
|
50 (Lesser) |
|
Spirit BearBM_bear_SPR_UNIQUE(Lake Fjalding during The Ristaag or Disrupt the Skaal Hunt) |
Heart of the Spirit Bear | 750 | — | — | — | — | ||
| The Good BeastBM_bear_be_UNIQUE(Involved in The Ritual of Beasts) | Chitin Arrow | 900 | 5 | — | — | — |
Character Information
- Attributes — A guide to the character attributes
- Birthsigns — A guide to the birthsigns, their granted abilities and in-game influence, in Morrowind
- Classes — Guide to the game’s built-in character classes, both for the player and NPCs
- Diseases — A complete catalogue of all diseases contractable within the bounds of Morrowind
- Level — Explains how your character gains levels, and how to make the most of each one
- Races — A thorough explanation of the defining characteristics of each race found within Morrowind, including their starting attributes and special abilities
- Skills — A definitive guide to character-based skills, with descriptions where applicable
- Vampires — Complete guide to vampires in Morrowind featuring information on becoming a vampire, vampire clans, how to cure vampirism, and vampire-based quests
Tips[]
For more elaborate strategies on defeating Blood Moon, including weapon and arena recommendations, see Guide:Defending against events.
- During a Blood Moon in Hardmode, every enemy and NPC has a
0.1*1/1000 (0.1%) chance of dropping the KO Cannon. This means that even though it is rare, like with the Blessed Apple, the large number of drop chances makes this easier to farm, and the KO Cannon is likely to aid a player in early Hardmode. - Simply placing a block in front of a door will prevent Zombies from being able to open the door.
- If the player sees the notification that a Blood Moon is rising and they are under-equipped to defeat it, they should get underground as quickly as possible. Going indoors will not save them, nor will standing around outside. The Blood Moon gives enemies dangerous abilities, such as the ability to open doors.
- Although the Blood Moon is typically treated as a deadly event, it is possible to enjoy the event. Once the player has max health and good weapons and armor, the new enemies are not a serious threat, especially if they have prepared their base. As the Tavernkeep says, «You know, where I’m from, a Blood Moon is actually just an excuse to get some fresh air.»
- The Blood Moon is a great place to use weapons with the Cursed Inferno debuff. It does significantly increased damage since 1.4.1, and most Blood Moon enemies are fast, meaning you’ll be dodging a lot more than in regular gameplay, and making Cursed Inferno (with its damage over time) much more useful.
Horkers[edit]
|
Horker in its habitat |
The Swimmer |
- «Another of the All-Maker’s wondrous creations. These creatures provide a great deal for our people. They are strong swimmers and fierce fighters, on land and in the sea.» — A Skaal
Description: A peaceful sea animal that is typical for the seaside of Solstheim. However, it will turn hostile if you get too close and will chase you even onto land.Found: Common at the northern seaside, in the rivers and the lakes.
| Creature | Drops | Attacks | Soul | ||
|---|---|---|---|---|---|
| HorkerBM_horker | Horker Tusk | 100 | 100 | 80 (Common) |
|
| HorkerBM_horker_large | |||||
|
The SwimmerBM_horker_swim_UNIQUE(Island off-shore from Moesring Mountains during The Ritual of Water) |
500 | — | 50 (Lesser) |
||
|
HorkerBM_horker_deadThese begin showing up in Moesring Mountains and Felsaad Coast regions duringThe Ristaag or Disrupt the Skaal Hunt quests |
— | 0 (None) |
Finding a Werewolf[edit]
Unfortunately, finding werewolves around Solstheim is not very easy; there are only nine in existence outside of the Main Quest. Wandering werewolves are found in human form during the day (between 6am and 9pm), with the name «Raving Lunatic», «Confused Lunatic» or something similar. During the night (9pm to 6am) you’ll find them in werewolf form, and should exercise caution when approaching them.
There are several werewolves found during the main quest. The attack during the Siege of the Skaal Village ensures that you will encounter at least seven, and contract Sanies Lupinus. If you cure yourself after the siege, ten werewolves will appear in the Tombs of Skaalara during the quest for The Totem of Claw and Fang. There is a total of 40 werewolves to be found during Hircine’s Hunt. Lastly, there is the werewolf that you create during the cure quest.
Начало Испытаний из Легенды о Нереварине
Вот это поворот. Оказывается, сам Император верит в пророчество о Нереварине. Более того, верит он и в то, что Нереварином может оказаться именно главный герой. Для выяснения всех обстоятельств Кай Косадес отправляет протагониста в лагерь Уршилаку, дабы тот встретился с главами Культа Нереварина, которые должны испытать его и выяснить, правдивы ли надежды Императора.
Заклинания «Пометка», «Возврат» и «Левитация» намного облегчат вам жизнь при прохождении этих квестов.
Лагерь Уршилаку расположен на северо-западе острова. Отправляйтесь в Хуул и двигайтесь на северо-восток по побережью мимо развалин Даэдра Ассурнабиташпи. Вскоре вы увидите стоянку Эшлендеров – это и есть Лагерь Уршилаку.
Расположите к себе кого-нибудь из местных аборигенов и скажите, что вы выполнили часть пророчеств о Нереварине. После этого вас отправят к Забамунду. Его юрта находится на юго-западе Лагеря. При разговоре с Забамундой скажите, что разузнали о Шестом Доме и Культе Нереварина, после чего вы получите разрешения говорить с нужными вам Главами Культа Нереварина: Сул-Матуулом и Нибани Меса.
Доверие Уршилаку – Обряд инициации

Первым делом следует встретиться с Матуулом. Его юрта располагается по соседству, справа от юрты Забамунда. Глава племени Уршилаку предложит пройти Обряд инициации. Заключается он в поиске Лука Костегрыз, который можно найти в Погребальных Пещерах Уршилаку. Пещеры расположены на юго-востоке от Лагеря Уршилаку и на северо-востоке от крепости Фаласмарион.
Нужный вам лук находится в ответвлении Погребальных Пещер Уршилаку под названием «Прекрасное захоронение», в юго-восточной его части на теле призрака. Получив искомый предмет возвращайтесь к Сул-Матуулу. После прохождение обряда инициации, глава племени Уршилаку назовет героя другом Клана и позволит задать нужные вопросы Нибани Меса – шаманки племени. Ее юрта располагается на севере Лагеря.
Шаманка расскажет много интересного о пророчестве и о семи испытаниях, именуемыми также «Семь видений». Информация свалилось столько, что пора поделится с Мастером-Шпионов Каем. Возвращайтесь в Балмору и доложите ему о том, что узнали.
Rieklings[edit]
|
Riekling (with background area) |
Riekling Raider (a Riekling riding a Tusked Bristleback) |
- «Foul creatures. Some call them the Falmer, claim they are related to the other elves. This I do not know, but they are vile. Some are intelligent enough to speak, but they speak only nonsense.» — A Skaal
Description: These little creatures reside in the coldest region of Solstheim and are often met in packs of five or more. While one is easy to fend off, a group can be a deadly threat. The Raider in particular is dangerous because it possesses a reflect ability and tends to be found in large groups.Found: Common in the colder northern and northwestern region of Solstheim.
| Creature | Drops | Attacks | Soul | ||||
|---|---|---|---|---|---|---|---|
| RieklingBM_riekling | Riekling BladeRiekling ShieldRandom Loot | 100 | 100 | — | — | 100 (Common) |
|
| RieklingBM_riekling_be_UNIQUE1BM_riekling_be_UNIQUE2BM_riekling_be_UNIQUE3BM_riekling_be_UNIQUE4BM_riekling_be_UNIQUE5(Attacking The Good Beast duringThe Ritual of Beasts) | Rusted Riekling BladeRiekling Shield | — | |||||
| DulkBM_riekling_Dulk_UNIQUE(Castle Karstaag, Throne Room) | Riekling BladeRiekling Shield | 200 | |||||
| KrishBM_riekling_Krish_UNIQU(Castle Karstaag, Caverns of Karstaag) | |||||||
| RieklingBM_riekling_be_UNIQUE(nowhere?) | Riekling Shield | ||||||
| Riekling BoarmasterBM_riekling_boarmaster(Frossel) | Nordic Silver AxeRiekling ShieldRandom Loot | 250 | 100 | ||||
| RieklingBM_riekling_st_UNIQUE(Isinfier Plains during The Ritual of Trees) | Riekling ShieldStrange Seeds | 300 | — | 50 (Lesser) |
|||
| Riekling Raider**BM_riekling_mounted | Bristleback LeatherRiekling LanceRiekling ShieldRandom Loot | 400 | 100 | 100 | 60 |
|
150 (Greater) |
** While the Riekling Raider may appear to be two creatures, a Riekling mounted on a Tusked Bristleback, they are for all practical purposes one creature. The rider can never be separated from his mount, even in death.
The Transformation[edit]
Every night you will have a vision of Hircine, and after that, you will be in werewolf form and will have to kill an NPC that night, or you will lose large amounts of health the following morning. While in werewolf form, you will have a permanent Detect Animal for 4000 points around you; however unlike the regular Detect Animal spell, this shows only NPCs on the Map (seeing as you need to kill an NPC every night to maintain your health, this is quite handy). You will also have 25 points of Night Eye. Your inventory is inaccessible and you cannot interact with anything (no looting, opening, unlocking, talking, etc.). Your only weapons when in werewolf form are your claws (they damage health instead of fatigue despite technically being considered your hands); you also can’t use magic.
Your attributes and skills are set to the following values, regardless of what they are in normal form:
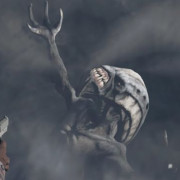
Hircine, Daedric Lord of the Hunt and Werewolves
| Stat | Value |
|---|---|
| Health | Twice Normal Amount |
| Strength | 150 |
| Agility | 150 |
| Speed | 150 |
| Endurance | 150 |
| Hand-to-Hand | 100 |
| Athletics | 150 |
| Unarmored | 100 |
| Acrobatics | 150 |
| Everything Else | 1 |
Additionally, your inventory weight is ignored, run speed is increased by 50%, and jumping distance is increased.[verification needed — This function?] Damage with a fully drawn Werewolf claw is normally equal to 125, or 175 if the Dream of Hircine quest has been completed.
More technically, maximum damage is equal to Hand-to-Hand * 5 * WerewolfClawMult, where WerewolfClawMult starts at 25 and is set to 35 after the aforementioned quest.
Normally, no one will know that you are a werewolf, but if you are seen transforming by anyone (even if you kill them immediately afterwards), all of Tamriel will know you are a werewolf and will usually attack you on sight even during the day. Each morning, you will transform back as you were before the transformation, except all of your equipment will be removed.
Contents[]
Characters
Anytime:
- The Groom
- The Bride
- Blood Zombie
- Drippler
On a Corruption world:
- Corrupt Bunny
- Corrupt Goldfish
- Corrupt Penguin
On a Crimson world:
- Vicious Bunny
- Vicious Goldfish
- Vicious Penguin
From Fishing:
- Wandering Eye Fish
- Zombie Merman
During Hardmode:
- Clown
- Chattering Teeth Bomb
From Fishing during Hardmode:
- Hemogoblin Shark
- Blood Eel
- Dreadnautilus
- Blood Squid
Unique Drops
Banners:
- The Groom Banner
- The Bride Banner
- Corrupt Bunny Banner
- Corrupt Goldfish Banner
- Corrupt Penguin Banner
- Blood Zombie Banner
- Drippler Banner
- Vicious Bunny Banner
- Vicious Goldfish Banner
- Vicious Penguin Banner
- Wandering Eye Fish Banner
- Zombie Merman Banner
Hardmode Banners:
- Clown Banner
- Hemogoblin Shark Banner
- Blood Eel Banner
- Dreadnautilus Banner
- Blood Squid Banner
From Corrupt Bunnies and Vicious Bunnies:
From Corrupt Penguins and Vicious Penguins:
From Corrupt Bunnies during Windy Days:
From Vicious Bunnies during Windy Days:
From The Groom:
- Top Hat
- Brain
From any Enemy or NPC (Dropped in Hardmode only):
From Dreadnautilus:
- Sanguine Staff
- Blood Moon Monolith
From Hemogoblin Shark:
From Blood Eel:
From The Bride:
- Wedding Veil
- Wedding Dress
From any Blood Moon Enemy:
From any Blood Moon Enemy caught during fishing:
From Hemogoblin Shark & Blood Eel:
From Wandering Eye Fish & Zombie Merman:
- Blood Rain Bow
- Vampire Frog Staff
- Chum Caster
From Drippler & Blood Zombie:
- Money Trough
- Shark Tooth Necklace
From Clown (In Hardmode only):
- Bananarang
- Trifold Map
From Vegetation:
From Fishing:
For Sale
From Clothier:
- Mime Mask
- Fallen Tuxedo Shirt
- Fallen Tuxedo Pants
- George’s set
- Fabulous set
From Zoologist:
From Dryad:
- Vile Powder(if world has Corruption)
- Corrupt Seeds(if world has Corruption)
- Corrupt Grass Wall(if world has Corruption)
- Vicious Powder(if world has Crimson)
- Crimson Seeds(if world has Crimson)
- Crimson Grass Wall(if world has Crimson)
- Sparkly Wings(if world is Hardmode)
From Arms Dealer:
- Silver Bullet
- Tungsten Bullet
From Dye Trader:
From Cyborg:
- Rocket II
- Cluster Rocket II
From Merchant:
From Painter:
From Steampunker:
- Purple Solution(if world has Corruption)
- Red Solution(if world has Crimson)
From Skeleton Merchant:
Music
- http://terraria.fandom.com/wiki/File:Music-Eerie.mp3
- http://terraria.fandom.com/wiki/File:Music-Eerie_(Otherworldly).mp3
History[]
-
Desktop 1.4.0.1:
- Blood moon now increases fishing power.
- Added the Chum Bucket, an item that increases fishing power.
- Added 5 new enemies, the Blood Eel, Zombie Merman, Wandering Eye Fish, Hemogoblin Shark and Dreadnautilus.
- Enemies drop extra money during Blood Moons.
- Can now be summoned using the Bloody Tear summoning item.
Desktop 1.3.0.6: The Dryad will now sell Vicious Powder in a Crimson world.
-
Desktop 1.3.0.1:
- The Bride, Blood Zombie and Drippler introduced, including their drops and banners.
- Improved atmosphere.
- The Skeleton Merchant was introduced, and sells the Slap Hand during the night of a Blood Moon.
- The Clothier sells the Fallen Tuxedo Shirt and Fallen Tuxedo Pants during the night of a Blood Moon.
Desktop 1.2.4: Rain no longer cancels Blood Moon, and now falls as blood.
-
Desktop 1.2:
- The water during this event now turns blood red.
- The KO Cannon now has a chance of dropping from enemies during this event.
- Bunnies/Goldfish spawned from statues no longer drop coins during a Blood Moon.
Desktop 1.1: The chance of a Blood Moon was decreased to 1/9 from its previous chance of 1/7.
Desktop-Release: Introduced.
Console version
Console-Release: Introduced.
Switch version
Switch 1.0.711.6: Introduced.
Mobile version
Mobile-Release: Introduced.
version
3DS-Release: Introduced.
Portal Battle Mode
When the Portal is open (every weekend, from Friday afternoon to Monday morning UTC), players will be able to choose from up to five portal levels, in relation to their current Knight level. Higher portal levels add a percentage of Event Points along with base amounts.
- Level 5
- Level 15: +20% extra points
- Level 25: +50% extra points
- Level 35: +100% extra points
- Level 45: +200% extra points
Event Points in this mode are earned based on the amount and type of enemies defeated, regardless of winning or losing.
| ENEMY | BASE POINTS | +20% | +50% | +70% | +200% |
|---|---|---|---|---|---|
| Garm | 100 | 120 | 150 | 200 | 300 |
| Fenrirgard Swordsman | 20 | 24 | 30 | 40 | 60 |
| Fenrirgard Swordsman (Lycan) | 90 | 108 | 135 | 180 | 270 |
| Fenrirgard Archer | 10 | 12 | 15 | 20 | 30 |
| Fenrirgard Archer (Lycan) | 90 | 108 | 135 | 180 | 270 |
| Skeleton Guardian | 20 | 24 | 30 | 40 | 60 |
| Skeleton Swordsman | 10 | 12 | 15 | 20 | 30 |
| Skeleton Archer | 10 | 12 | 15 | 20 | 30 |
Players are given three free attempts per day until the event ends. Once all attempts are used, three additional attempts may be purchased for 120 Gems. Purchasing the Event Pass gives another three free daily attempts for a total of 6 per day.
Trivia
- An odd exception to the Blood Moon failing to trigger at midnight while in is during the first fight against . If midnight strikes on a Blood Moon night during this first battle, Calamity Ganon’s health will refill to maximum as if neither nor the had done him any damage. Strangely, this exception does not apply to the battle against .
- The sky turning red at 11:50 PM also occurs when Dark Beast Ganon reveals its core, allowing Link to deal the final blow.
- When the console is using 90% or more of its system memory, a panic Blood Moon can be triggered as part of a garbage collection routine. This allows the console to clean up its system memory and restore performance to an optimal state. This can occur at any time of day and is otherwise no different than a naturally occurring blood moon.
Quick Walkthrough[edit]
- Speak to Korst Wind-Eye to learn about the Bloodmoon Prophecy (if you aren’t a werewolf).
- Rest somewhere for a while to be taken by the Hunter, Hircine. Be ready, you cannot return to town until the end.
- Enter the Outer Circle of the Mortrag Glacier and find Captain Carius. Team up with him to kill werewolves and find the key to the central gate in a chest (just kill him if you’re a werewolf).
- Leave Carius behind and enter the Inner Circle to find Tharsten Heart-Fang inside.
- Team up with Tharsten and explore the area. Eventually he will turn into a werewolf and attack you. Kill him and get the key from his corpse (he will turn into a werewolf immediately if you are also a werewolf).
- Continue to the Huntsman’s Hall where you’ll meet, and kill, the frost giant Karstaag.
- Move to the portal in the north where you’ll meet Hircine once again.
- Select one of the three aspects that you wish to fight. Defeat it in battle.
- Loot the key from the corpse and exit via the portal.
- Watch a short cutscene. Return to Korst and Fort Frostmoth to finish the main quest.
Восстановление Клинка Неревара

После выполнения задания «Пропавшая рука» поговорите с Альмалексией. Она скажет, что верит в то, что протагонист это реинкарнация Неревара, а также поручит восстановить его клинок. Одна часть клинка у нее есть. Вам же необходимо найти еще две части, а также кузнеца, который этот клинок восстановит.
- Первая часть клинка. Вы найдете ее в музее артефактов, который располагается в южной части Годсрича. Поговорите с хозяйкой музея Торасой Арам. Она поведает о необычном двемерском щите, который и является искомой частью Истинного Пламени, так называется клинок Неревара. Однако отдать его бесплатно она наотрез откажется. Чтобы получить нужную вещь, необходимо предоставить что-нибудь взамен. В роли компенсации подойдут два любых великих артефакта Тамриэля. Посмотреть какие предметы этими артефактами являются вы можете в одноименной книге, которая лежит на лавочке позади Торасы Арам. Ваш покорный слуга отдал Посох Магнуса, найденный в пещере Ассу на склоне Горы Канд и Лук теней, который попался мне при расхищении родовой гробницы Венимов на юго-западе от Воса.
- Вторая часть клинка. Отправляйтесь в тронный зал королевского дворца и поговорите с Карродом. Он заговорит с вами только в том случае, если вы выполнили квест . Спросите у редгара о части клинка и тот с радостью отдаст его.
Теперь необходимо найти кузнеца, который поможет восстановить клинок Нереварина. Отправляйтесь в Зал Мастеров Годсрича. Там нужно найти орка Ягак гро-Глюка, вот такое веселое имечко. Для начала следует отдать ему Двемерский боевой щит. Опытный глаз кузнеца сразу определит постороннюю часть в конструкции и разделит его на обычный Двемерский щит и Часть двемерского клинка. Готово. Теперь вы обладаете всеми тремя частями клинка Истинное Пламя. Попросите Ягака сковать для вас оружие, что он любезно согласится сделать. Подождите два дня, а затем возвращайтесь к Ягак гро-Глюку и он отдаст готовый меч.
Клинок то вы получили, однако, на нем нет никаких чар. А для того чтобы эти чары наложить, нужен двемер. Случилось так, что все они вымерли много лет назад. Вот так незадача. Однако небольшая зацепка все же есть. В руинах Бамз-Амсшенд некогда жил один сильный двемерский мистик. Ягак гро-Глюк советует отправиться туда и поискать какие-нибудь записи Радак Стунгнтумце, так звали этого двемерского мага.
Отправляйтесь на Плазу Бриндизи Дорум, а оттуда в руины Бамз-Амсшенд (вход в центре под разрушенной статуей). Сразу хотелось бы сказать, что вам понадобится Двемерский ранцевый заряд. На данном этапе игры у вас должен остаться один из таких, так как в квесте «Демонстрация силы» вы скорее всего нашли два экземпляра. Для разрушения завала необходим был один заряд, соответственно, один должен лежать где-то в инвентаре.
Если же вы его по каким-то причинам потеряли, то спешу вас успокоить. В руинах Бамз-Амсшенд всего можно найти три Двемерских ранцевых заряда. Два в локации «Кузница Радака» и один в локации «Зал Ветров».
Итак, обзаведясь зарядом двигайтесь вглубь руин Бамз-Амсшенд. Путешествие будет проходить в таком порядке: Зал Сердечного Огня > Проход Шепота > Кузница Радака. Здесь, в комнате слева, вы встретите духа Радак Стунгнтумце. Попросите его зачаровать Клинок Неревара после чего он отправит вас за пиройловой смолой. Найти ее можно в пещерах Мин Дхура.
Отправляйтесь в северную часть Кузницы Радака, там где вы расчищали проход от завала в квесте «Демонстрация Силы», и проходите в локацию «Проход Идущего». Здесь, в юго-западной части, вы найдете еще один завал. Тут-то и пригодится второй Двемерских ранцевый заряд. Очистите с помощью него путь и продвигайтесь дальше в Норенен-дюр.
В восточной части Нюренен-дура найдите проход в Скрежещущие Зубы, откуда вы сможете попасть в даэдрические руины Мин Дхрур. В северной части этой локации найдите и убейте Каш-Ти Друра. На его теле заберите искомую пиройловую смолу, которую нужно отнести духу Радака. После того как вы отдадите смолу двемеру-мистику, он вернет былую силу клинку Истинное Пламя. Готово. Возвращайтесь к Альмалексии и расскажите о проделанной работе.
Notes[edit]
- Even if a Werewolf is under the influence of a player’s Command Humanoid spell, there is a high chance that a nearby NPC will attack the brainwashed Werewolf and vice-versa, even if the other NPC is itself a Werewolf. To avoid potential bloodshed, cast a Calm Humanoid or Command Humanoid spell with a radius effect at all participating combatants.
- Other than the player and a few other NPCs, the majority of the Werewolves present in the Bloodmoon expansion are permanently trapped in beast form and never revert to a humanoid shape, whether it is day or night.
- Any NPC will engage in combat with you on sight if you are a werewolf, regardless of their . This even includes those with a fight value of zero, who would normally only engage if attacked first. Lower level NPCs or those with a high may run away instead, but a combat situation is always unavoidable when encountering NPCs as a werewolf.