Town hall (heroes of hammerwatch)
Содержание:
Secret Areas[]
- SPECIAL NOTE: There are no «cracked» walls in the Armory. Instead, ‘cracked’ walls are represented by bare segments of wall that have about 5 grey tiles in a darker hue than the regular walls. These will be referred to as «discolored» walls.
- Floor 4
- When passing by the Bronze Gate holding the Skeleton Army, another Bronze Gate to the right contains a switch that reveals a small alcove containing a Bomb Tile puzzle. Solving this reveals another hidden passageway within the Skeleton Army room, leading to a Token and other treasure.
- When under the grates near the Red Spike Trap, look for a set of three red wall banners with a small black hole in the center banner. This can be walked through, leading to a Golden Ankh.
- To the immediate left of the Red Spike Trap secret is a button that reveals a small room with a Token slightly north.
- In the upper-left area, near where 2 Gargoyle Statues are, there is a Discolored Wall near the Slime Bubble portion. (IMAGE HELP: http://i.imgur.com/z3yD5Gy.png)
- Floor 5
- At a dead end with 3 Apples in a line, there is a Discolored Wall on the upper left corner. (IMAGE HELP: http://i.imgur.com/av8089S.png)
- At at Save Point nestled in a small left-sided alcove, head right towards — and through — a passageway leading to a small cluster of Skeleton Spawners with Fire Turrets north of them. The upper left corner of the room has a Discolored Wall. (IMAGE HELP: http://i.imgur.com/WLhda1h.png)
- At the dead end featuring 2 Copper Gates, 2 Oranges, and a Golden Ankh, there is a fake wall in the room behind the right-side Copper Gate. (IMAGE HELP: http://i.imgur.com/1Abwd2W.png)
- Floor 6
- When heading right from the starting point, you’ll come to a temporary wall. On the other side of the wall, a Fake Wall Banner can be found. (IMAGE HELP: http://i.imgur.com/nA4vuKQ.png)
- South-east of the + Arrow Trap room (w/ 5 pressure switches), there is a Discolored Wall clearly visible. (IMAGE HELP: http://i.imgur.com/DiNVb1X.png)
- Within the arrow trap room, there are two mini side rooms, each having a button on the wall. Hitting them both with activate a hidden passage to the left of the room revealing two apples and a treasure chest, as well as a floating bridge north of the open area to the left of this room, which leads to a previously inaccessible area on Floor 5, where the items on top of the pyramids can be obtained, and a strange plank sent up to an accessible pyramid top on Floor 6.
- Within the previously mentioned area, two doors to Floor 4 can be opened; one creates a shortcut between Floors 4 and 6 while also making a Vendor Coin obtainable, and the other leads back to a portion of the starting area on Floor 4, where two chests and a strange plank can be obtained. Also in this room, a Discolored Wall can be seen in the top left corner, which reveals a room containing the second Easter Egg.
Potion
The player is equipped with a potion that they can drink by pressing R or Spacebar by default. The potion will heal the player by an amount determined by their upgrades to it from the Apothecary.
The set items will give the player extra bonuses when drinking a potion. A key effect is from the Mortar and Pestle which gives the player 50% more armor and resistance for 5 seconds after drinking a potion. The player can preempt a difficult fight by drinking a potion, even if it’s not a dire situation, to gain a temporary defense bonus to aid survival during the fight.
If the player has beaten the Pyramid of Prophecy DLC campaign, they will be rewarded with the dijnn Nimbus residing within the player’s potion. He will come out and help you fight dealing 60 magical damage and sticking around 30 seconds. The damage and duration increases by 10 and 2 respectively per NG level beaten on the pyramid.
The epic item will automatically use the player’s potion should they take a hit that would kill them. This effect can occur as many times as the player has potion doses. Currently the player will still be killed if the damage taken exceeds the player’s maximum health, but it is going to be changed to save the player from hits up to (player health pool + amount healed from potion) in a future update.
Statues and Effects
(The Statues are content that is part of the Pyramids of Prophecy DLC)
| Name | Image | Effect |
|---|---|---|
| Kyra |  |
Build effect: 20% faster Primary Attack with a 50% chance to fire 2 arrows dealing 10 Physical damage
Upgrade effect: Base damage of the arrows is increased by 4. «She who named her bow The One String Harp, ’cause when it was plucked, her enemies would sing in agony.» |
| Phalarath |  |
Build effect: Lowers the health of an attacker by 5% when evading.
Upgrade effect: Each level of the statue increases damage done to disarmed and stunned enemies by +5% «Snuck in behind enemy lines and gutted pirate Captain Marius, this would eventually stop the siege of Castle Hammerwatch.» |
| Cedric | 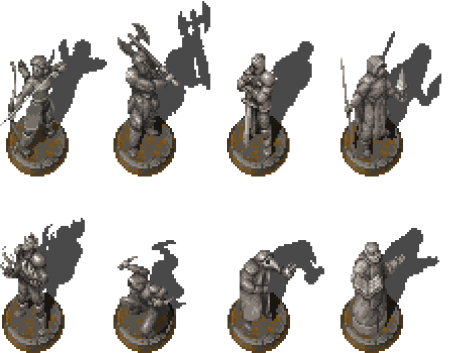 |
Build effect: Picking up mana crystals increases your Mana Regen and Resistance by 20% for 30 seconds.
Upgrade effect: Each level of the statue adds +5% of your Resistance to Skill Power. «Also known as «The Delayer of Death», at the peak of his career, the cemetery stood empty for many years.» |
| Calis |  |
Build effect: 20% chance to block most projectiles.
Upgrade effect: Each level of the statue adds +5% of your Armor to Attack Power. «Raised from childhood to fight the undead and protect the living. Devoted his life to serve the people.» |
| Ewran | Build effect: 7.5% to freeze enemies on Primary Attack.
Upgrade effect: Each level of the statue increases damage done to frozen enemies by +5%. «During a warm summer night, she froze Williamsons Pure Lake so the King could move his troops safely across.» |
|
| Wylmir |  |
Build effect: 20% faster Skills.
Upgrade effect: Each level of the statue adds 5% of the skill cost as damage to your Skills. «Used his last breath to blaze the caves and clean out the trolls between Blackbarrow and Fallowfields.» |
| Ozreth | Build effect: 20% chance of enemies leaving a poison cloud when killed that lasts for 4 seconds.
Upgrade effect: Each level of the statue increases damage done to poisoned enemies by +10%. «An outcast, master in death and decay who paid his debt to society by curing Queen Olivia at the darkest hour.» |
|
| Bolgarth | Build effect: Every 5th Primary Attack in Combo triggers a Combo Blast that deals 100 Magical damage.
Upgrade effect: Each level of the statue increases time to maintain Combo by 0.5 seconds. «Bolgarth’s axe was known as the «Crimson Crescents», because it was always red by the blood of his enemies.» |
|
| Daran | Build effect: Damage dealt to enemies that are burning has a 10% chance to also inflict bleeding.
Upgrade effect: Each level of the statue increases damage done to burning enemies by 5%. «Daran, a red priest, drew evil out of heathens with holy fire and bloodsucking maggots.» |
Monoliths
These can be found in any act. Interacting with one will grant you a temporary buff. The rewards is random there is no way of knowing what you will get.
Greater Insight cannot be gotten when you are at the max level you can reach in that run.
| Shrine buffs | |||
|---|---|---|---|
| Icon | Name | Effect | Duration |
| Protective Powers | -50% damage taken | 10 minutes | |
| Incredible Strength | x2 overall damage | 5 minutes | |
| Greater Insight | +100% experience | 15 minutes | |
| Vigorous Restoration | 20 HP a second | 8 minutes | |
| Endless Potential | Free skills | 4 minutes | |
| Gold Fever | +100% Gold gain | 15 minutes | |
| Rapid Blows | +50% Primary attack speed | 8 minutes | |
| Sundering Strikes | Ignore 50% of enemy Armor and Resistance | 8 minutes | |
| Nimble Limbs | +50% movement speed (Arena only) | 30 seconds | |
| Fortuitous Events | +5 Luck | 8 minutes |
Heroes of Hammerwatch (Русская версия)
Heroes of Hammerwatch – это пиксельный рогалик с процедурной генерацией мира. Отправляйтесь на поиски приключений, выбрав один из 7 классов героев. В зависимости от класса героя меняется геймплей игры. Прокачивайте умения, ищите или покупайте предметы, а также развивайте свой родной город, строя различные здания. Все это поможет вам сделать настоящего героя, которому поп плечу любые задания. Хотя одной из ключевых особенностей рогалилка является перманентная смерть, все же разработчики Heroes of Hammerwatch не стали нервировать игроков и сохранили процесс прокачки даже после смерти.Heroes of Hammerwatch — это приключенческий боевик, действие которого происходит в той же вселенной, что и Hammerwatch. Встречайтесь с бесконечными ордами врагов, ловушками, головоломками, секретами и множеством добычи, пробиваясь через процедурно сгенерированные уровни, чтобы достичь вершины Отрекшегося Шпиля.Облегченный rogue-lite с большим постоянным прогрессом. Вы будете начинать каждый забег в Outlook, городе, который вы можете улучшать, чтобы дать своим героям различные улучшения, которые еще больше помогут вам в ваших поисках. Сами герои тоже останутся стойкими, вы даже можете привести своих героев в игру своим друзьям!Ключевые особенности игрыHeroes of Hammerwatch (Русская версия):- Контент, сгенерированный процедурой: случайно сгенерированные уровни предлагают высокую ценность воспроизведения и приносят вам новую задачу с каждым прохождением.- Постоянный прогресс: ваши герои сохранят опыт, полученный во время бега, и станут сильнее по мере повышения уровня.- Улучшения города: постройте / улучшите 10 различных зданий, которые разными способами помогут вашим героям.- Классы: выберите один из 7 различных классов, каждый из которых обладает уникальными характеристиками, способностями и стилями игры.- Предметы: найдите или купите более 100 уникальных предметов различной редкости.- Кооперативная игра: играйте с 3 друзьями в кооперативном режиме.- New Game +: Heroes of Hammerwatch станет настоящим испытанием, и даже если вы его победите, оно никогда не закончится!Дополнения игрыHeroes of Hammerwatch (Русская версия):- Heroes of Hammerwatch: Witch Hunter- Heroes of Hammerwatch: Pyramid of Prophecy- Heroes of Hammerwatch: Moon TempleМинимальные системные требования игрыHeroes of Hammerwatch (Русская версия):- Операционная система: Windows 7, 8, 10- Процессор: Intel Core Duo- Оперативная память: 2 GB ОЗУ- Видеокарта: OpenGL 3.2+ / DirectX 11+- Место на диске: 500 Мб

 Жанр: Приключение / Аркада / РоуглайкЯзык интерфейса: Русский / Multi 4Инсталлятор. Версия игры: 104Размер: 251 МбСкачать с Облака:
Жанр: Платформер / Рогалик
+18
Stats
The player starts off at level 1. Every time the Priest levels up, stat boosts are gained.
What differs the Priest from other classes is the high HP regen per level, double that of any other class.
This can be further doubled with the blessing, and doubled again with Remedy, leading to extremely high HP regen
However the Priest cannot directly heal himself, he must use Consecrated Ground to self-heal.
To get stats at a given level, use the equation «X = Scaling * (Level-1) + Level_1_Stats»
| Attribute values by level | ||||||
|---|---|---|---|---|---|---|
| Attribute | Health | Mana | Health Regen | Mana Regen | Armor | Resistance |
| Level 1 | 30 | 70 | 1.9 | 3 | ||
| Scaling per Level | +5 | +11 | +0.05 | +0.1 | +0.2 | +0.5 |
| Level 2 | 35 | 81 | 0.05 | 2.0 | 0.2 | 3.5 |
| Level 3 | 40 | 92 | 0.10 | 2.1 | 0.4 | 4 |
| Level 4 | 45 | 103 | 0.15 | 2.2 | 0.6 | 4.5 |
| Level 5 | 50 | 114 | 0.20 | 2.3 | 0.8 | 5 |
| Level 10 | 75 | 169 | 0.45 | 2.8 | 1.8 | 7.5 |
| Level 15 | 100 | 224 | 0.70 | 3.3 | 2.8 | 10 |
| Level 20 | 125 | 279 | 0.95 | 3.8 | 3.8 | 12.5 |
| Level 25 | 150 | 334 | 1.20 | 4.3 | 4.8 | 15 |
| Level 30 | 175 | 389 | 1.45 | 4.8 | 5.8 | 17.5 |
Sarcophagi
The player will occasionally run into a sarcophagus that they can plunder. The sarcophagus acts like a «free» shop, containing 5 items no matter what and the player can pick and choose what they want from it. The game will pause in single player when interacting with a sarcophagus.
When the player picks the items they want (skipping the sarcophagus is allowed) they will be given Curse based on what items they took. the more items they pick the more curse they will get give, with Epic items being worth 51 curse, Rare 16 (2 rares are worth 51), Uncommon 4 (2 uncommmon are 11), and Common 1. The values of the curse given grow exponentially the more items the player takes, and care should be taken to manage how much curse the player contracts as it will cause problems for the player the more curse they have.
Heroes
Paladin
耐久力に優れたクラス。盾を持ち、前方からの遠距離物理攻撃を無効化する。
囲まれても脱出できる突進スキルを持つため、大群相手でも圧死しにくい。
また、足は止まってしまうがHPを回復スキルも持つ。
ゲーム序盤~中盤においては、攻撃角度が広く威力もそこそこの Primary Attack や
遠距離物理攻撃を防ぐ盾、回復スキル等も相まって初心者でも使いやすい。
ノーマルモードクリア後は敵をかき集めて耐えたり、反射ダメージを狙う構成を組んだりといった
特殊な運用が必要になってくるので、初心者向けと思わせながらも奥が深いクラス。
Ranger
Primary Attack の攻撃射程が非常に長く、敵を複数貫通する。
コンボ状態やマナ消費に依存せずとも安定した高火力が望める。
敵の足を止めるスキルや回避パッシブも持つため、生存力もそこそこ。
範囲攻撃スキルも持っているが、エリア型ではなく周囲に向けて矢を乱射するタイプで
攻撃時間も短いため、集団に対する攻撃力については過信は禁物。
部屋の入口や曲がり角をうまく利用して、貫通で複数の敵を仕留める技量が求められる。
ボスに隣接しなくとも戦えるため、ゲーム序~中盤の初心者~中級者にも扱いやすい。
Sorcerer
壁や敵にぶつかると、次の壁や敵に向かって跳弾する攻撃を持つ。
壁や敵集団を利用してうまく攻撃を連鎖させることが重要なクラス。
また、敵を凍結させたり鈍足状態にする手段を多く持つ。
ほとんどの攻撃がハイブリッドダメージ(物理/魔法混合)のため
アーマーだけが高い敵や、抵抗だけが高い敵に対して攻撃力がガタ落ちしないのが特徴。
一方で、火力は運(Shatter が発動するかどうか)次第のため安定せず、ボス戦も苦手。
不安定な火力を補うためにマナ回復力を上げて自発的にスキルを連射したり、
Primary Attackを強化するアイテムを揃えるなど、色んな意味で大器晩成なクラス。
特性も運用方法もピーキーなため上級者向けと言える。
Warlock
近くの敵を自動で攻撃する雷スキルを多く持つ。
また、雷を伝播させたり、敵を倒した時にHPやマナを回復するパッシブを備える。
魔法クラスではあるが、HPは全クラスの中でもかなり高い部類。
コウモリやFallen系など、壁の中にいる敵を雷で攻撃できる唯一のクラスでもある。
マナ消費量に対するダメージが決して高くはなく燃費が悪いため、序盤はボス戦に苦労する。
マナ回復力を確保すると安定化が望める。
パッシブスキル選びやマナ回復について理解する必要があり、中級者向けのクラス。
Thief
近接火力に優れ、確実にスタンを取るスキルも備える。
敵を倒すたびに攻撃速度と回避率を上げるパッシブや、所持金に応じて与ダメージが上がるパッシブを持つ。
Primary Attack で遠距離物理攻撃を叩き落とすこともできるが、ややシビア。
叩き落とせたらラッキー、あるいは矢に対して剣を振らないよりはマシという程度に考えよう。
ある程度スキルレベルが上がらないと攻撃力も回避率もイマイチで、大器晩成型。
火力を発揮するにはリスクを覚悟で接近する必要があり、上級者向けのクラス。
条件が整えば対雑魚・対ボスともに一定以上の火力を発揮できる。
Priest
回復・防御補助に優れたクラス。
攻撃以外に味方の回復にも使えるレーザーや、
敵へのダメージを陣内の味方HP回復に転換する魔法陣設置スキルを持つ。
自分を自発的に回復するスキルは無く、魔法陣または自然回復が頼りとなる。
攻撃面は魔法陣設置とパッシブによる自動攻撃、レーザーの併用が主となり
対集団を一気に殲滅する能力は控えめ。
一方で対単体は非常に得意で、ボス戦はかなり楽なクラス。
スキルレベルが上がるまでは攻撃も回復も乏しく、防御系パッシブもリスキーなため
大器晩成型かつ中~上級者向け。
Wizard
範囲攻撃に秀でたクラス。
あらゆるスキルで地面を炎上・延焼させるため、持続的に広範囲を攻撃し続けることができる。
華とも言えるメテオはもちろん、Primary Attackも全クラスを通して強力な部類。
見た目の通りHP・防御面が凄まじく貧弱で、ちょっとしたミスが命取りになりうる。
一定確率でダメージを半減するパッシブもあるが、基本的には上級者向けのクラス。
メテオに目が行きがちだが、実際はPrimary Attackを撃つ機会もかなり多い。
スキルパワーだけではなく攻撃力も強化していきたい。
#ref(): File not found: «Gladiator.jpg» at page «Heroes»
DLCで追加されたクラス。
Springs
A spring can spawn on any floor but there is usually one per Act on average. Using it will fully restore you to your max health and mana as well as fill any empty potion charges you might have.
The only guaranteed spring in the game is directly before on floor 2 of the Battlements.
If you are seeking to get the Potion Gulpers then the Unlimited Springs Fountain fortune can allow you to get all of them with a single fountain, all you have to do is drain a little mana or HP and drink a potion over and over, then refill at the spring.
If you are looking to get the Replenishers achievement then this fortune will not work, as the counter only ticks up when a spring is drained, and since the fortune prevents the spring from draining it will never tick up. It is recommended to start working on this achievement early as the highest tier of this achievement, use 500 wells, will take about 83 runs on average to complete if you make it all the way to the dragon each run, and use every fountain you come across.
Skills and Abilities
The tables below list base values and tiers as they’re shown in the Guild Hall.
As an example, the first upgrade for Consecrated Ground can be bought at a Tier 2 guild hall.
Every upgrade to a skill costs , which are shown in the upper-right corner of the screen while in town.
| Priest skills | ||||||
|---|---|---|---|---|---|---|
| Smite | Holy Light | Consecrated Ground | Aura of Purification | Divine Protection | Remedy | Celestial Orbs |
 |
Smite (Primary Attack)
A mid-ranged attack dealing . Every upgrade increases the area of impact.
Note: Smite does not stop the use of other skills.
Priest primary attack speed is 0.25 seconds.
| Upgrades | Base | Tier 1 | Tier 2 | Tier 3 | Tier 4 | Tier 5 |
|---|---|---|---|---|---|---|
| Damage | 8 | 10 | 12 | 14 | 16 | 18 |
| Star Cost | N/A | 3 | 4 | 5 | 6 | 8 |
Holy Light (Skill 1)
Fires a beam of holy light that builds up and deals along with healing allies inside it by a base plus 1% of their max health.
The beam has a charge up time before dealing or healing the maximum amount and damages enemies in a small AOE.
The beam can travel through players healing all of them at once.
| Upgrades | Base | Tier 1 | Tier 2 | Tier 3 | Tier 4 | Tier 5 |
|---|---|---|---|---|---|---|
| Damage | 17 | 24 | 31 | 38 | 45 | 52 |
| Heal | 2+1% | 3+1% | 4+1% | 5+1% | 6+1% | 7+1% |
| Mana Cost | 3 | 4 | 5 | 6 | 7 | 8 |
| Star Cost | N/A | 3 | 4 | 5 | 6 | 8 |
Consecrated Ground (Skill 2)
A magic circle is placed on the ground that lasts for a few seconds. Enemies within its area take magical damage that hits every half second.
25% of the damage dealt is returned to allies standing within the area as health. This heal is affected by the Priest’s Remedy.
| Upgrades | Base | Tier 1 | Tier 2 | Tier 3 | Tier 4 | Tier 5 |
|---|---|---|---|---|---|---|
| Damage | N/A | N/A | 16 | 24 | 32 | 40 |
| Duration | N/A | N/A | 5 | 5.5 | 6 | 6.5 |
| Mana Cost | N/A | N/A | 45 | 60 | 75 | 90 |
| Star Cost | N/A | N/A | 5 | 6 | 8 | 10 |
Aura of Purification (Skill 3)
An active ability that creates an aura around the player affecting both players and enemies.
Enemies have their speed and resistance lowered, while allies gain a damage reduction effect.
| Upgrades | Base | Tier 1 | Tier 2 | Tier 3 | Tier 4 | Tier 5 |
|---|---|---|---|---|---|---|
| Speed Reduc. | N/A | N/A | N/A | 20% | 30% | 40% |
| Resist. Reduc. | N/A | N/A | N/A | 20% | 30% | 40% |
| Damage Reduc. | N/A | N/A | N/A | 10% | 20% | 30% |
| Mana Cost | N/A | N/A | N/A | 50 | 60 | 70 |
| Star Cost | N/A | N/A | N/A | 7 | 9 | 12 |
Divine Protection (Passive 1)
This passive shield absorbs a portion of incoming damage at the cost of some mana per damage absorbed. makes this shield free and the drain can be reduced by effects making skills cheaper to cast.
The will help sustain this shield, but will only return mana from the damage that the player actually takes.
| Upgrades | Base | Tier 1 | Tier 2 | Tier 3 | Tier 4 | Tier 5 |
|---|---|---|---|---|---|---|
| Absorption | N/A | 30% | 35% | 40% | 45% | 50% |
| Mana/Damage | N/A | 4 | 2 | 1 | .75 | .5 |
| Star Cost | N/A | 2 | 3 | 4 | 5 | 6 |
Remedy (Passive 2)
The priest regains health more effectively from all sources. Listed HP regen is also affected invisibly.
| Upgrades | Base | Tier 1 | Tier 2 | Tier 3 | Tier 4 | Tier 5 |
|---|---|---|---|---|---|---|
| Effectiveness | N/A | N/A | 50% | 100% | 150% | 200% |
| Star Cost | N/A | N/A | 4 | 5 | 6 | 8 |
Celestial Orbs (Passive 3)
Multiple orbs rotate around the Priest that fire small beams of holy light, dealing magical damage. These beams can be aimed by hitting the target with Holy Light.
The orb’s range when using Holy Light is based on the level of your Holy Light skill.
| Upgrades | Base | Tier 1 | Tier 2 | Tier 3 | Tier 4 | Tier 5 |
|---|---|---|---|---|---|---|
| Orbs | N/A | N/A | N/A | N/A | 2 | 3 |
| Damage | N/A | N/A | N/A | N/A | 8 | 12 |
| Star Cost | N/A | N/A | N/A | N/A | 10 | 15 |
Skills and Abilities
The tables below list base values and tiers as they’re shown in the guild hall.
As an example, the first upgrade for Branding Ward can be bought at a Tier 2 guild hall.
Every upgrade to a skill costs skill points, which are denoted as stars in the upper-right corner of the screen while in town.
| Witch Hunter skills | ||||||
|---|---|---|---|---|---|---|
| Repeater Crossbow | Flaming Hounds | Branding Ward | Witch Pyre | Fanatic Zeal | A Murder of Crows | Searing Torch |
 |
Repeater Crossbow (Primary Attack)
Fires 4 bolts in quick succession. Each bolt deals that ignores armor.
Bolts pierce enemies but lose 50% damage with each enemy pierced.
Every upgrade increases the base damage and the amount of armor ignored.
Witch Hunter primary attack speed is 0.9 seconds.
| Upgrades | Base | Tier 1 | Tier 2 | Tier 3 | Tier 4 | Tier 5 |
|---|---|---|---|---|---|---|
| Damage | 5 | 8 | 11 | 14 | 17 | 20 |
| Armor Ignored | 5 | 10 | 15 | 20 | 25 | 30 |
| Star Cost | N/A | 3 | 4 | 5 | 6 | 8 |
Flaming Hounds (Skill 1)
The Witch Hunter unleashes a Flaming Hound that bounces five times in a forward direction.
The hound explodes when bouncing dealing , which is increased by 50% with each bounce.
| Upgrades | Base | Tier 1 | Tier 2 | Tier 3 | Tier 4 | Tier 5 |
|---|---|---|---|---|---|---|
| Damage | 10 | 15 | 20 | 25 | 30 | 35 |
| Mana Cost | 20 | 25 | 30 | 35 | 40 | 45 |
| Star Cost | N/A | 3 | 4 | 5 | 6 | 8 |
Branding Ward (Skill 2)
Places a ward on the ground that triggers when enemies get close.
Enemies hit by the ward take and are branded.
Branded enemies take 100% more damage.
| Upgrades | Base | Tier 1 | Tier 2 | Tier 3 | Tier 4 | Tier 5 |
|---|---|---|---|---|---|---|
| Damage | N/A | N/A | 40 | 60 | 80 | 100 |
| Duration | N/A | N/A | 3 | 4 | 5 | 6 |
| Max Wards | N/A | N/A | 4 | 6 | 8 | 10 |
| Mana Cost | N/A | N/A | 40 | 45 | 50 | 55 |
| Star Cost | N/A | N/A | 5 | 6 | 8 | 10 |
Witch Pyre (Skill 3)
Places a pyre on the ground that last for 7.5 seconds.
Enemies that hit the pyre ignite an explosion dealing .
Enemies close to the pyre also start burning.
The pyres have their own Health, Armor, and Resistance that scales with the level of the skill and character skill power.
| Upgrades | Base | Tier 1 | Tier 2 | Tier 3 | Tier 4 | Tier 5 |
|---|---|---|---|---|---|---|
| Health | N/A | N/A | N/A | 300 | 500 | 700 |
| Armor | N/A | N/A | N/A | 10 | 20 | 30 |
| Resistance | N/A | N/A | N/A | 10 | 20 | 30 |
| Damage | N/A | N/A | N/A | 40 | 80 | 120 |
| Mana Cost | N/A | N/A | N/A | 65 | 90 | 115 |
| Star Cost | N/A | N/A | N/A | 7 | 9 | 12 |
Fanatic Zeal (Passive 1)
Generates stacks of Fanatic Zeal when casting a skill.
Each stack increases critical hit chance for all attacks and skills by 2.5%.
Fanatic Zeal stack number and duration scale with the level of the skill.
| Upgrades | Base | Tier 1 | Tier 2 | Tier 3 | Tier 4 | Tier 5 |
|---|---|---|---|---|---|---|
| Stacks | N/A | 4 | 5 | 6 | 7 | 8 |
| Duration | N/A | 4 | 5 | 6 | 7 | 8 |
| Star Cost | N/A | 2 | 3 | 4 | 5 | 6 |
A Murder of Crows (Passive 2)
Unleashes Crows when taking damage that defend the Witch Hunter.
Cooldown reduced per level.
| Upgrades | Base | Tier 1 | Tier 2 | Tier 3 | Tier 4 | Tier 5 |
|---|---|---|---|---|---|---|
| Crows | N/A | N/A | 5 | 7 | 9 | 11 |
| Cooldown | N/A | N/A | 10 | 9 | 8 | 7 |
| Star Cost | N/A | N/A | 4 | 5 | 6 | 8 |
Searing Torch (Passive 3)
Throws a torch towards a random nearby enemy when casting a skill.
The torch explodes on impact dealing and apply burning.
| Upgrades | Base | Tier 1 | Tier 2 | Tier 3 | Tier 4 | Tier 5 |
|---|---|---|---|---|---|---|
| Damage | N/A | N/A | N/A | N/A | 60 | 120 |
| Star Cost | N/A | N/A | N/A | N/A | 10 | 15 |
Classes
Mercenaries use the same base stats as the classes, here is a table for easy comparison
| Attribute values by level | ||||||
|---|---|---|---|---|---|---|
| Attribute | Health | Mana | Health Regen | Mana Regen | Armor | Resistance |
| Paladin | 75 | 50 | 0.4 | 10 | ||
| Scaling per Level | +8 | +6 | +0.025 | +0.05 | +0.6 | +0.2 |
| Priest | 30 | 70 | 1.9 | 3 | ||
| Scaling per Level | +5 | +11 | +0.05 | +0.1 | +0.2 | +0.5 |
| Ranger | 50 | 50 | 0.5 | |||
| Scaling per Level | +6 | +6 | +0.025 | +0.075 | +0.5 | +0.2 |
| Sorcerer | 40 | 75 | 1.5 | 2.0 | ||
| Scaling per Level | +5 | +16 | +0.025 | +0.1 | +0.2 | +0.5 |
| Thief | 40 | 40 | 0.5 | |||
| Scaling per Level | +5 | +8 | +0.025 | +0.1 | +0.3 | +0.3 |
| Warlock | 60 | 75 | 1.5 | 2 | 2 | |
| Scaling per Level | +6 | +13 | +0.025 | +0.075 | +0.3 | +0.3 |
| Wizard | 35 | 75 | 1.5 | 2 | ||
| Scaling per Level | +4 | +15 | +0.025 | +0.1 | +0.2 | +0.5 |
| Gladiator | 65 | 50 | 0.5 | 2 | ||
| Scaling per Level | +7 | +7 | +0.025 | +0.05 | +0.3 | +0.3 |
| Witch Hunter | 45 | 60 | 0.75 | 1 | 3 | |
| Scaling per Level | +6 | +7 | +0.025 | +0.075 | +0.3 | +0.5 |
Armor and Resistance
The player will gather armor and resistance while playing through items, character upgrades, class titles, or from temporary effects. Having a strong defense is critical the survival of the player and the completion of a run. If the player is unable to deal with the damage they are taking, the will inevitably fall.
Armor reduces the physical damage taken, resistance reduces the magical.
To calculate how much damage your armor and resistance is protecting you from, see the section below.
When the player’s armor is negative(from NG+, drinks, or both), they will take increased damage from monsters. Unlike having a high positive defense, where new points do less and less for the player, increased negative defensive stats will always increase damage taken by 2% per negative amount.
Stats
The player starts off at level 1. Every time the Witch Hunter levels up, stat boosts are gained.
To get stats at a given level, use the equation «X=scaling*(level-1)+level1stat»
| Attribute values by level | ||||||
|---|---|---|---|---|---|---|
| Attribute | Health | Mana | Health Regen | Mana Regen | Armor | Resistance |
| Level 1 | 45 | 60 | 0.75 | 1 | 3 | |
| Scaling Per Level | +6 | +7 | +0.025 | +0.075 | +0.3 | +0.5 |
| Level 2 | 51 | 67 | 0.025 | 0.825 | 1.3 | 3.5 |
| Level 3 | 57 | 74 | 0.05 | 0.9 | 1.6 | 4 |
| Level 4 | 63 | 81 | 0.075 | 0.975 | 1.9 | 4.5 |
| Level 5 | 69 | 88 | 0.1 | 1.05 | 2.2 | 5 |
| Level 10 | 99 | 123 | 0.225 | 1.425 | 3.7 | 7.5 |
| Level 15 | 129 | 158 | 0.35 | 1.8 | 5.2 | 10 |
| Level 20 | 159 | 193 | 0.475 | 2.175 | 6.7 | 12.5 |
| Level 25 | 189 | 228 | 0.6 | 2.55 | 8.2 | 15 |
| Level 30 | 219 | 263 | 0.725 | 2.925 | 9.7 | 17.5 |
Dye List
| SKIN | |
|---|---|
| For all | |
| Name | Rarity |
| Shade1 | Default |
| Shade2 | Default |
| Shade3 | Default |
| Shade4 | Default |
| Bronzed | Legacy |
| Pale | Legacy |
| Ghastly | Legacy |
| Demonic | Legacy |
| Frosted | Legacy |
| Risen | Legacy |
| Rock | Legacy |
| HAIR | |
|---|---|
| For all | |
| Color | Rarity |
| Black | Default |
| Blonde | Default |
| Brown | Default |
| Dark Brown | Common |
| Gray | Common |
| Mossy | Common |
| Byzantine | Common |
| Dark Gray | Uncommon |
| Fandango | Uncommon |
| Repunzel | Uncommon |
| Red | Uncommon |
| Vermilion | Uncommon |
| White | Uncommon |
| Blue | Rare |
| Dryad | Rare |
| Flame | Rare |
| Frozen | Rare |
| Green | Rare |
| Phantom | Rare |
| Pink | Rare |
| Prism | Rare |
| Darkness | Legacy |
| Emerald | Legacy |
| Frozen | Legacy |
| Molten | Legacy |
| Rainbow | Legacy |
| CLOTH | |
|---|---|
| For all except Paladin | |
| Color | Rarity |
| Blue | Default |
| Brown | Default |
| Green | Default |
| Red | Default |
| Gray | Common |
| Lavender | Common |
| Leathered | Common |
| Light Blue | Common |
| Salmon | Common |
| Sand | Common |
| Tan | Common |
| Aqua | Uncommon |
| Ash | Uncommon |
| Charcoal | Uncommon |
| Elven | Uncommon |
| Forest | Uncommon |
| Imperial | Uncommon |
| Lemon | Uncommon |
| Metallic | Uncommon |
| Moss | Uncommon |
| Pink | Uncommon |
| Scarlet | Uncommon |
| Teal | Uncommon |
| Banshee | Rare |
| Gold | Rare |
| Ice | Rare |
| Lime | Rare |
| Magma | Rare |
| Midnight | Rare |
| Solaire | Rare |
| Violet | Rare |
| White | Rare |
| Darkness | Legacy |
| Divine | Legacy |
| Emerald | Legacy |
| Frozen | Legacy |
| Molten | Legacy |
| Rainbow | Legacy |
| METAL | |
|---|---|
| For Paladin, Warlock, & Gladiator | |
| Name | Rarity |
| Green | Default |
| Gray | Default |
| Light blue | Default |
| Blue | Common |
| Citrus | Common |
| Hunter | Common |
| Jungle | Common |
| Orange | Common |
| Patina | Common |
| Coagulation | Uncommon |
| Dark Blue | Uncommon |
| Darkness | Uncommon |
| Firefly | Uncommon |
| Jade | Uncommon |
| Lilac | Uncommon |
| Majestic | Uncommon |
| Pink | Uncommon |
| Purple | Uncommon |
| Rust | Uncommon |
| Silver | Uncommon |
| Black | Rare |
| Bright | Rare |
| Gold | Rare |
| Hailstone | Rare |
| Iridescent | Rare |
| Molten | Rare |
| Resurrected | Rare |
| Ruby | Rare |
| Shimmer | Rare |
| Darkness | Legacy |
| Emerald | Legacy |
| Frozen | Legacy |
| Molten | Legacy |
| Rainbow | Legacy |
| LEATHER | |
|---|---|
| For Ranger, Thief, & Gladiator | |
| Name | Rarity |
| Brown | Default |
| Red | Default |
| Desert | Common |
| Flamingo | Common |
| Garnet | Common |
| Scourge | Common |
| Sunny | Common |
| Black | Uncommon |
| Eclipse | Uncommon |
| Gore | Uncommon |
| Liana | Uncommon |
| Pink | Uncommon |
| Regal | Uncommon |
| Tar | Uncommon |
| Violet | Uncommon |
| White | Uncommon |
| Amber | Rare |
| Blue | Rare |
| Frost | Rare |
| Ghost | Rare |
| Gilded | Rare |
| Green | Rare |
| Serpent | Rare |
| Darkness | Legacy |
| Emerald | Legacy |
| Frozen | Legacy |
| Molten | Legacy |
| Rainbow | Legacy |
| WOOD | |
|---|---|
| For Priest, Ranger, Warlock, & Wizard | |
| Name | Rarity |
| Dark brown | Default |
| Light brown | Default |
| Black | Common |
| Bumblebee | Common |
| Green | Common |
| Mahogany | Common |
| Nobel | Common |
| White | Common |
| Blood | Uncommon |
| Blue | Uncommon |
| Darkside | Uncommon |
| Malachite | Uncommon |
| Rivulet | Uncommon |
| Violet | Uncommon |
| Glacier | Rare |
| Gold | Rare |
| Hearth | Rare |
| Pink | Rare |
| Spectre | Legacy |
| Darkness | Legacy |
| Emerald | Legacy |
| Frozen | Legacy |
| Molten | Legacy |
| Rainbow | Legacy |
Vitality[]
Below are the costs and benefits of each of the Vitality vendor’s items. The columns are in pairs by class, with the cost listed beside each respective value.
| Name | Cost | Paladin | Cost | Ranger | Cost | Wizard | Cost | Warlock | Cost | Thief |
|---|---|---|---|---|---|---|---|---|---|---|
| Health Pool 1 | 600 | 120 | 700 | 80 | 800 | 40 | 500 | 115 | 600 | 50 |
| Health Pool 2 | 1200 | 165 | 1400 | 110 | 1500 | 55 | 1000 | 130 | 1200 | 70 |
| Health Pool 3 | 1800 | 210 | 2200 | 140 | 2200 | 70 | 1500 | 145 | 1800 | 90 |
| Health Pool 4 | 2400 | 255 | 2900 | 170 | 2900 | 85 | 2000 | 160 | 2400 | 110 |
| Health Pool 5 | 3000 | 300 | 3500 | 200 | 3600 | 100 | 2500 | 175 | 3000 | 130 |
| Mana Pool 1 | 800 | 75 | 700 | 80 | 600 | 130 | 800 | 150 | 800 | 65 |
| Mana Pool 2 | 1900 | 100 | 1400 | 110 | 1400 | 185 | 1400 | 225 | 1900 | 90 |
| Mana Pool 3 | 3000 | 125 | 2200 | 140 | 2200 | 240 | 2200 | 300 | 3000 | 115 |
| Mana Pool 4 | 4100 | 150 | 2900 | 170 | 3000 | 295 | 3000 | 375 | 4100 | 140 |
| Mana Pool 5 | 5200 | 175 | 3500 | 200 | 3800 | 350 | 3800 | 450 | 5200 | 165 |
| Move Speed 1 | 600 | 1.0 | 600 | 1.0 | 600 | 1.0 | 600 | 1.0 | 600 | 1.0 |
| Move Speed 2 | 1200 | 1.1 | 1200 | 1.1 | 1200 | 1.1 | 1200 | 1.1 | 1200 | 1.1 |
| Move Speed 3 | 1600 | 1.2 | 1600 | 1.2 | 1600 | 1.2 | 1600 | 1.2 | 1600 | 1.2 |
Upgrades, Costs, Effects
| Tier 1 | ||
|---|---|---|
| Building | Cost | Effect |
| Town Hall | Unlocked by default | |
| Treasury | Unlocked by default. 50% tax rate at 10000 total gold | |
| Guild Hall | Unlocked by default. Upgrade your skills to Tier 1 | |
| General Store | 5 | Buy keys and items (3 common) |
| Blacksmith | 5 | Buy upgrades to your weapons (primary attack) and armor |
| Ore Trader | 5 | Buy and sell ore |
| Apothecary | 5 | Buy upgrades for your potion |
| Fountain | — | — |
| Chapel | — | — |
| Tavern | — | — |
| Magic Shop | — | — |
| Tier 2 | ||
|---|---|---|
| Building | Cost | Effect |
| Town Hall | 5 | Unlocks the next tier of Town Hall upgrades |
| Treasury | 20 | 50% tax rate at 15000 total gold |
| Guild Hall | 10 | Upgrade your skills to Tier 2 |
| General Store | 10 | Buy keys and items (2 common, 1 uncommon)Prices are 5% cheaper |
| Blacksmith | 10 | Buy upgrades to your weapons (primary attack) and armor |
| Ore Trader | 10 | Buy and sell ore. Better trade rates |
| Apothecary | 15 | Buy upgrades for your potion and pickup effectiveness |
| Fountain | 10 | Throw gold in the Fountain to afford different fortunes |
| Chapel | 15 | Unlocks Priest. Donate money to receive a permanent blessing |
| Tavern | 10 | Unlocks Thief. Adds gambling. Buy up to 3 drinks |
| Magic Shop | — | — |
| Tier 3 | ||
|---|---|---|
| Building | Cost | Effect |
| Town Hall | 20 | Unlocks the next tier of Town Hall upgrades |
| Treasury | 40 | 50% tax rate at 20000 total gold |
| Guild Hall | 30 | Upgrade your skills to Tier 3 |
| General Store | 25 | Buy keys and items (3 common, 1 uncommon)Prices are 10% cheaper |
| Blacksmith | 25 | Buy upgrades to your weapons (primary attack) and armor |
| Ore Trader | 30 | Buy and sell ore. Better trade rates |
| Apothecary | 35 | Buy upgrades for your potion and pickup effectiveness |
| Fountain | — | — |
| Chapel | 35 | Donate money to receive a permanent blessing |
| Tavern | 20 | Buy up to 4 drinks. Increased stockpile limit for drinks |
| Magic Shop | 30 | Unlocks Wizard. Buy upgrades to your skills and resistance |
| Tier 4 | ||
|---|---|---|
| Building | Cost | Effect |
| Town Hall | 40 | Unlocks the next tier of Town Hall upgrades |
| Treasury | 80 | 50% tax rate at 25000 total gold |
| Guild Hall | 60 | Upgrade your skills to Tier 4 |
| General Store | 50 | Buy keys and items (2 common, 1 uncommon, 1 rare)Prices are 15% cheaper |
| Blacksmith | 50 | Buy upgrades to your weapons (primary attack) and armor |
| Ore Trader | — | — |
| Apothecary | — | — |
| Fountain | 25 | More fortunes to select from |
| Chapel | — | — |
| Tavern | 40 | Buy up to 5 drinks. Increased stockpile limit for drinks |
| Magic Shop | 60 | Buy upgrades to your skills and resistance |
| Tier 5 | ||
|---|---|---|
| Building | Cost | Effect |
| Town Hall | 80 | Unlocks the next tier of Town Hall upgrades |
| Treasury | 160 | 50% tax rate at 30000 total gold |
| Guild Hall | 120 | Upgrade your skills to Tier 5 |
| General Store | 100 | Buy keys and items (2 common, 2 uncommon, 1 rare)Prices 20% cheaper |
| Blacksmith | 100 | Buy upgrades to your weapons (primary attack) and armor |
| Ore Trader | — | — |
| Apothecary | — | — |
| Fountain | — | — |
| Chapel | 135 | Donate money to receive a permanent blessing |
| Tavern | — | — |
| Magic Shop | 120 | Buy upgrades to your skills and resistance |
| Tier 6 | ||
|---|---|---|
| Building | Cost | Effect |
| Town Hall | 160 | Unlocks the next tier of Town Hall upgrades |
| Treasury | — | — |
| Guild Hall | — | — |
| General Store | 200 | Buy keys and items (3 common, 2 uncommon, 1 rare)Prices 20% cheaper |
| Blacksmith | 200 | Buy upgrades to your weapons (primary attack) and armor |
| Ore Trader | — | — |
| Apothecary | — | — |
| Fountain | — | — |
| Chapel | 250 | Donate money to receive a permanent blessing |
| Tavern | — | — |
| Magic Shop | 200 | Buy upgrades to your skills and resistance |
Boss, Nerys
Enemy type: Aberration
The final boss, Nerys, is a powerful djinn that took control of another djinn, Nimbus, long ago and was trapped at the top of the pyramid as punishment. He wields many powerful attacks and can quickly kill the player if they are not prepared for his attacks.
Nerys will always start out by attacking with his sword. When he attacks with it, fire waves will shoot out in the direction he swung. These do moderate damage, but are very fast and will boomerang back towards the player, all waves from the same swing converging at the same spot, and will leave a circle of fire on the ground. The player is lit on fire if they are hit by any part of this attack. The further into the fight the player is, the more fire waves will be summoned, with 7(?) being summoned once Nerys reaches 25% hp the first time.
Every so often Nerys will teleport to a different location in the arena, often close to an edge. This can be somewhat problematic for melee characters as the red mist around the arena will fire at the player if they get too close to the edge, applying armor and resistance break(magebane and shieldbreaker) to the player. Right after Nerys teleports, he will fire off black orbs in all directions that cause bleeding, darkness effect on NG+, and drain the player’s mana similar to the Arch Lich diamond from the if they player gets hit by them and when they land they will summon an X of fire that deals magic damage and lasts for about 10(?) seconds before disappearing.
It should be noted that Nerys moves similarly to a Lich in that he will continually back away from the player, so getting between him and the edge of the room is effective in keeping him closer to the middle.
When Nerys reaches 75%, 50%, and 25% HP he will heal up to 50% of his max life if the player is not able to deal enough damage to stop further healing. During his heal he will summon other djinn to fight the player, along with creating large purple orbs in a circular wave that deal very high damage to any players within them when they burst. This wave starts with one orb directly under him, and continues to radiate outwards before repeating. There IS enough space for a melee character to be directly next to Nerys after the first orb bursts without being hit by the second circle of orbs.
Rewards
Along with the regular gold and ore the player receives, when the player defeats Nerys, Nimbus is freed and is eternally indebted to you. To show his thanks, he now resides within the player’s potion and will come out for 30 seconds plus 2 for every PoP NG+ level the player has beaten on that character. Nimbus deals 60 magical damage +10 per NG+ beaten and attacks just like the Sphere Djinn. Additionally, Nimbus adds 25 HP and Mana per level to your potion.
Additionally the player will receive 10 for each NG level they beat the pyramid on.
While not directly from the PoP campaign, the player can also acquire statue blueprints if they are at the correct NG+ level for obtaining statue blueprints outlined at the top of the page or on the Statues page.
Multiplayer and pickups
Gold and ore pickups in multiplayer are awarded fully to all members. Note that individual bonus multipliers to gold or ore gain will cause amounts between players to differ.
- Example: when picking up 100 gold, a player with a +20% gold gain will receive 120 gold, whereas a player with no bonus gold gain will receive 100 gold.
- The same principle applies to bonuses to ore gain.
Gold pickup base values
| Gold pickup base values | |||||||||||
|---|---|---|---|---|---|---|---|---|---|---|---|
| Image | Gold Value | Image | Gold Value | Image | Gold Value | Image | Gold Value | Image | Gold Value | Image | Gold Value |
 |
1 | 3 | 5 | 50 | 250 | 1000 | |||||
| 5 | 13 | 27 | 100 | 500 | 2500 | ||||||
| 10 | 25 | 42 |
Note that there is only one style of ore pickup, which has a base value of 1 ore.
Portals and Red Rooms
These rectangular looking portals are the level skippers of the game. They are always found in the first level of every act and only spawn after you defeated the boss of that respective chapter at least once on that New Game Plus level.
Example: For the portal to appear in the Mines, you must kill the Stone Guardian. For it to appear in the Prison, you must defeat the Warden once.
What happens when I go in?
You reach a room with a red cube that has a large chunk of HP. Once you hit it enemies will start spawning, with a new wave appearing every 10 seconds until the cube it killed.
Additionally, every time the cube loses a chunk of health (Reticle colors when hovering over it change from red back to green) it will summon an extra wave of enemies.
This means if you are able to quickly kill the pillar in only a few seconds, about 10 waves of enemies will spawn one after another with less than half a second in between waves.
Once the cube is destroyed, every enemy in the room is killed instantly.
Beating a Red Room for the first time and picking up the sphere where the cube was will unlock for your entire guild.