Android-x86
Содержание:
- Android вместо Windows
- Released Files
- Join us
- Sponsors
- Credit
- Android-x86
- The branches in Android-x86 tree
- Install to USB disk
- Key Features
- Getting Android-x86 source code
- Виды дистрибутивов
- Key Features
- Released Files
- Remix OS for PC
- Новости и улучшения Android 9.0 в проекте Android-x86
- Bliss OS-x86
- Save data to USB/hard disk
- Debug Howto
- Testing
- OpenThos
- Используем Android x86 для запуска на компьютере
Android вместо Windows
Авторы проекта Android-x86 сообщили об успешном портировании мобильной платформы на ноутбуки, планшетные компьютеры и настольные ПК с архитектурой х86. Сейчас система существует в виде стабильной версии, выпуску которой предшествовали два релиз-кандидата (Release-Candidate – почти готовые бета-версии), но ее разработка продолжается.
В последний раз Android-x86 анонсировали стабильную настольную версию Android в мае 2018 г., и на тот момент система базировалась на мобильной Android 7.1. По сравнению с ней разработчики внесли в систему большое количество изменений, затрагивающих как визуальную, так и техническую составляющую.
Android 8.1 Oreo за авторством Android-x86 – это полноценная операционная система, в ряде случаев способная заменить собой ОС Windows, к примеру, когда компьютер поставляется без предустановленной системы, носителя с дистрибутивом нужной ОС от Microsoft под рукой нет.

Внешне Android-x86 8.1 Oreo действительно очень напоминает Windows 10
ОС Android, напомним, изначально ориентирована на мобильные устройства с архитектурой ARM. Google официально не поддерживает перенос системы на х86-совместимые устройства.
Released Files
This release contains four files. You can choose one of these files depends on your devices. Most modern devices should be able to run the 64-bit ISO. For older devices with legacy BIOS, you may try the 32-bit ISO.
- 64-bit ISO: android-x86_64-9.0-rc1.iso
sha1sum: 89d47aeb419b4124002af68aeb584dae75653eb3
- 32-bit ISO: android-x86-9.0-rc1.iso
sha1sum: ac546a8ea1eb275ecdbe77f9e8e33fa80668bef4
- 64-bit rpm: android-x86-9.0-rc1.x86_64.rpm
sha1sum: 6abd0a0bff86fd202f967f8f6add2ab1709ba244
- 32-bit rpm: android-x86-9.0-rc1.i686.rpm
sha1sum: 2e5e222e2b3ec7ec453fcdf0839058267fc0d493
To use an ISO file, Linux users could just dump it into a usb drive to create a bootable usb stick like:
where /dev/sdX is the device name of your usb drive.
Windows’s users can use the tool Win32 Disk Imager to create a bootable usb stick.
Please read this page about how to install it to the device.
Except the traditional ISO files, we also package android-x86 files into a Linux package rpm. It allows Linux users to easily install the release into an existing Linux device with a standalone ext4 root partition. On an rpm based device (Fedora/Red Hat/CentOS/SUSE…), just install it like a normal rpm package:
This will update your older installation like 7.1-r3 or 8.1-r3 if you have.
On a deb based device (Debian/Ubuntu/LinuxMint/…), please use the alien tool to install it:
All files will be installed to the /android-9.0-rc1/ subdirectory and boot entries will be added to grub2 menu. Reboot and choose android-x86 item from the menu to boot Android-x86. Alternatively, you can launch Android-x86 in a QEMU virtual machine by the installed qemu-android script:
Note Android-x86 running in QEMU and the real machine (after rebooting) share the same data sub-folder.
Join us
If you are interesting in running Android on PC or netbook, consider to join us. See how to contact us.
Sponsors
Sponsored by Onlinecasino24.org.
Sponsored by Allvideoslots.com.
Thanks to www.newcasinosonline.co for contributing for our website.
Sponsored by GoWin — PayPal Casinos and Presented by Slotsify — Alla Casinon i Sverige.
Thanks to casinobonuses.com — The best way to compare casino bonuses.
A big thank you to Ready Slots Go for contributing to this page.
Sponsored by KingCasinoBonus.co.uk – mobile casino reviewer.
Sponsored by Terrarium tv.
Sponsored by SlotsAdviser.com — the #1 online slots portal in the UK and an Android mobile casinos fan.
Thanks to Coffee Corner for buying us a drip coffee maker.
Sponsored by the best bookmaker in the world, bet365 and by newfreespinscasino.com which offers an unique bitcoin casino list.
Sponsored by StickerYou.com, manufacturers of quality Custom Stickers and Custom Labels.
Sponsored by Showbox and Customer Service Number
Acuity Training for various technical advice.
Sponsored by 9APPS APK DOWNLOAD & Android Apps Free Download.
Sponsored by TutuApp.
Sponsored by Lucky Patcher Apk & Freedom Apk.
Sponsored by Lucky Patcher and Microsoft Support.
Supported by Official ShowBox Website, ShowBox APK and FaceTime for PC.
Sponsored by ShowBox for Android & ShowBox APK file.
Sebastian Albrecht from Vancouver special, Lorne Marr, Toronto Realtor Elli Davis, and Chantal Marr from No medical life insurance for their support.
Credit
Current project maintainer is Chih-Wei Huang (cwhuang@android-x86.org).
0xlab, a group of engineers enthusiastic in open source software development , contributed many fixes and improvements to the Android frameworks, included the OpenGL ES hardware acceleration for Android-x86.
Michael Chen <omxcodec@gmail.com> who developed the stagefright-plugins to improve the multimedia support.
Dima Zavin <dima@android.com>, the original guy ported the Android to EeePC 701
Geunsik Lim <leemgs@gmail.com>, wrote original «HOWTO Build Android-X86 Full Source» and «How to use x86 android platform on virtualbox »
Chen Yang <sunsetyang@gmail.com> for the instructions on the how to make boot-able image and how to build Android for VMware, and investigations on almost all of the build breaks and run time issues
Jackie Wu <jackie.wu@intel.com> for the fix in alarm.c
Niels Keeman <nielskeeman@gmail.com> for the investigation on the path issue in the battery service jni code, v4l2 camera support (android-m912 project)
Luca Belluccini <lucabelluccini@gmail.com> for the first patch to fix the path issue in the battery service jni code
Kevin Jeng <khjeng@princeton.edu> for adding the mouse wheel support
Andrew Hughes <ashughes@gmail.com> for the works on iwlwifi4965 and Thinkpad x61 testing
Al Sutton <alsutton@android-x86.org> for testing and work on the ViewSonic ViewPad 10
Android-x86
This OS option has the goal of being a “complete solution for Android on common x86 platforms.” according to the developers. As they say on the official website, “You may think Android-x86 as an Android BSP (Board Support Package) of generic x86 platforms.”
There are tons of software that lets you use Android on PC but not all work the same. Android-x86 is one of the finest open-source systems for your x86 or x64 computer.
It provides a wide range of supports such as a multi-touch screen, Wi-Fi, Bluetooth, camera, and many more features.
The Android-x86 uses the Linux kernel 4.19.15 which enables it to support a wide variety of hardware. Overall, it is one of the most resourceful Android OS systems out there. Currently, the developers are working to support Android 10 as well (the current version is 9).
The branches in Android-x86 tree
Since AOSP evolves very quickly, we have created different branches corresponding to different releases of AOSP:
-
q-x86
Based on Android 10.0 release -
pie-x86
Based on Android 9.0 release (Pie QPR2) -
oreo-x86
Based on Android 8.1 release (Oreo MR1) -
nougat-x86
Based on Android 7.1 release (Nougat MR2) -
marshmallow-x86
Based on Android 6.0 release (Marshmallow) -
lollipop-x86
Based on Android 5.1 release (Lollipop) -
kitkat-x86
Based on Android 4.4 release (KitKat) -
jb-x86
Based on Android 4.3 release (Jelly Bean) -
ics-x86
Based on Android 4.0 release (Ice Cream Sandwich) -
honeycomb-x86
Based on Android 3.2 release (Honeycomb) -
gingerbread-x86
Based on Android 2.3 release (Gingerbread) -
froyo-x86
Based on Android 2.2 release (Froyo) -
eclair-x86
Based on Android 2.1 release (Eclair) -
donut-x86
Based on Android 1.6 release (Donut) -
cupcake-x86 (aka android-x86-b0.9)
Based on Android 1.5 release (Cupcake)
Install to USB disk
For advanced linux users, you may create a bootable USB disk by hand. Here are the steps:
- Install grub to your USB disk
- find a linux machine with the latest grub installed
- partition your USB drive with fdisk or gpartd and mark the partition as bootable
- format that partition to ext4 (recommended) or vfat.
- mount your usb drive to /mnt
- cd /mnt
- grub-install —root-directory=. —no-floppy /dev/<your usb device node name>
- cd /boot/grub
- create your menu.lst based on the next section
Add this section to menu.lst
title Run Android-x86
kernel /android/kernel root=/dev/ram0 androidboot.selinux=permissive SRC=/android
initrd /android/initrd.img
title Run Android-x86 (VESA mode)
kernel /android/kernel root=/dev/ram0 androidboot.selinux=permissive vga=788 SRC=/android
initrd /android/initrd.img
title Run Android-x86 (Debug mode)
kernel /android/kernel root=/dev/ram0 androidboot.selinux=permissive vga=788 SRC=/android DEBUG=1
initrd /android/initrd.img
Note androidboot.selinux=permissive must be added since nougat-x86. Besides, before marshmallow-x86, androidboot.hardware=<target> must be added to specify the target name of the built image. However, do not add this option since nougat-x86.
Since kitkat-x86 the SRC= parameter may be omitted if the system image is in the same directory as the kernel.
Create /android directory in the USB disk, and copy the four files kernel initrd.img ramdisk.img system.sfs (or system.img if you set USE_SQUASHFS=0) to it.
Then you can boot from the USB disk and enjoy Android. Note all data are saved to the ramdisk, so all will lose after power off. If you hope to save data to disk, see the next section.
Key Features
The 9.0-r1 release is based on the latest Android 9.0.0 Pie release (android-9.0.0_r53). The features include:
- Support both 64-bit and 32-bit kernel and userspace with latest LTS kernel 4.19.105.
- Support OpenGL ES 3.x hardware acceleration for Intel, AMD, Nvidia and QEMU(virgl) by Mesa 19.3.4.
- Support OpenGL ES 2.0 via SwiftShader for software rendering on unsupported GPU devices.
- Support hardware accelerated codecs on devices with Intel HD & G45 graphics family.
- Support secure booting from UEFI and installing to UEFI disk.
- A text based GUI installer.
- Add theme support to GRUB-EFI.
- Support Multi-touch, Audio, Wifi, Bluetooth, Sensors, Camera and Ethernet (DHCP only).
- Simulate WiFi adapter on devices with Ethernet only to increase app compatibility.
- Auto-mount external usb drive and sdcard.
- Add Taskbar as an alternative launcher which puts a start menu and recent apps tray on top of your screen and support freeform window mode.
- Enable ForceDefaultOrientation on devices without known sensors. Portrait apps can run in a landscape device without rotating the screen.
- Support arm arch apps via the native bridge mechanism. (Settings -> Android-x86 options, 64-bit only)
- Support to upgrade from non-official releases.
- Add experimental Vulkan support for newer Intel and AMD GPUs. (Boot via Advanced options -> Vulkan support)
- Mouse integration support for VMs including VirtualBox, QEMU, VMware and Hyper-V.
Getting Android-x86 source code
Firstly, refer to the AOSP page «Establishing a Build Environment» to configure your build environment. For Ubuntu 18.04, install the following required packages:
Then pull down the Android-x86 source tree to your working directory by:
Where $branch is one of the branch names described in the previous section. Note the projects created or modified by android-x86 are fetched from our git server. All the other projects are still downloaded from the repositories of AOSP.
If you have issues to sync from the git protocol, try the alternative http one
If you hope to keep syncing your tree with Android-x86 repository, just do repo sync. No need to do repo init again. However, sometimes you may see conflicts during repo sync. See the section «How to Solve Conflicts» for how to solve this situation.
Note: The Android-x86 repository is very big (more than 20GB for oreo-x86). If you encounter problems of sync it, it’s likely a network problem or our server is too busy. Repeatedly run ‘repo sync‘ until it succeeds without any error. Do not bother us with any of the syncing problem.
Виды дистрибутивов
В рамках проекта Android-x86 портированный Android 8.1 доступен в двух основных модификациях – универсальных Live-сборках для 32- и 64-битных компьютеров, планшетов и ноутбуков. Размеры дистрибутивов, уже доступных для скачивания и установки, составили 675 МБ и 856 МБ соответственно. Также эти сборки можно запускать и на планшетных компьютерах на базе процессоров Intel и AMD.
Вместе с обычными Live-сборками девелоперы выпустили их модификации в виде rpm-пакетов. Они нужны для распаковки Android-окружения в среде Linux.
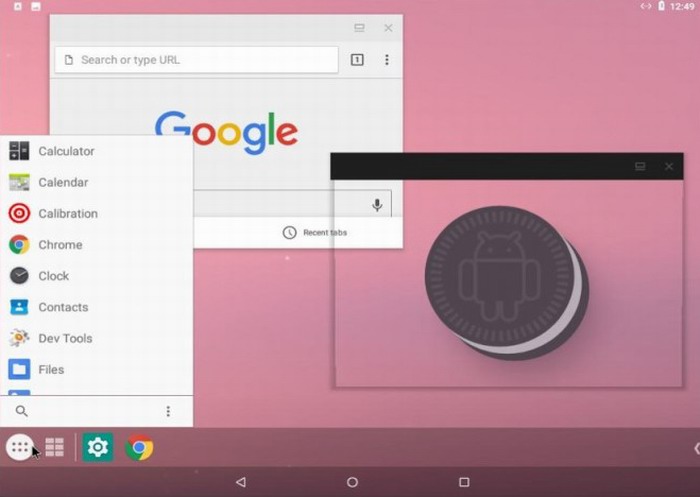
Android-x86 8.1 Oreo позволяет менять «обои» и поддерживает прозрачные окна
Все сборки распространяются на бесплатной основе, а пользователи ранних версий Android от Android-x86 могут обновиться до Android 8.1 без переустановки.
Key Features
The 9.0-rc1 release is based on the latest Android 9.0.0 Pie release (android-9.0.0_r50). The features include:
- Support both 64-bit and 32-bit kernel and userspace with latest LTS kernel 4.19.80.
- Support OpenGL ES 3.x hardware acceleration for Intel, AMD, Nvidia and QEMU(virgl) by Mesa 19.0.8.
- Support OpenGL ES 3.0 via SwiftShader for software rendering on unsupported GPU devices.
- Support hardware accelerated codecs on devices with Intel HD & G45 graphics family.
- Support secure booting from UEFI and installing to UEFI disk.
- A text based GUI installer.
- Add theme support to GRUB-EFI.
- Support Multi-touch, Audio, Wifi, Bluetooth, Sensors, Camera and Ethernet (DHCP only).
- Auto-mount external usb drive and sdcard.
- Add Taskbar as an alternative launcher which puts a start menu and recent apps tray on top of your screen and support freeform window mode.
- Enable ForceDefaultOrientation on devices without known sensors. Portrait apps can run in a landscape device without rotating the screen.
- Support arm arch apps via the native bridge mechanism. (Settings -> Android-x86 options)
- Support to upgrade from non-official releases.
- Add experimental Vulkan support for newer Intel and AMD GPUs. (Boot via Advanced options -> Vulkan support)
- Simulate WiFi adapter by Ethernet to increase app compatibility.
- Mouse integration support for VMs including VirtualBox, QEMU, VMware and Hyper-V.
Released Files
This release contains four files. You can choose one of these files depends on your devices. Most modern devices should be able to run the 64-bit ISO. For older devices with legacy BIOS, you may try the 32-bit ISO.
- 64-bit ISO: android-x86_64-8.1-r1.iso
sha1sum: b8e83b66ca98b0e38fd295d6640c02b60b767129
- 32-bit ISO: android-x86-8.1-r1.iso
sha1sum: 4267750e698b89b853450f27cf1d1cf76c8a4d8b
- 64-bit rpm: android-x86-8.1-r1.x86_64.rpm
sha1sum: 4f0cfbe83417829def3c0a9644b944489b579205
- 32-bit rpm: android-x86-8.1-r1.i686.rpm
sha1sum: d3b586fceaaced28cc2f3b1b8217a22ff9ee8291
To use an ISO file, Linux users could just dump it into a usb drive to create a bootable usb stick like:
where /dev/sdX is the device name of your usb drive.
Windows’s users can use the tool Win32 Disk Imager to create a bootable usb stick.
Please read this page about how to install it to the device.
Except the traditional ISO files, we also package android-x86 files into a Linux package rpm. It allows Linux users to easily install the release into an existing Linux device with a standalone ext4 root partition. On an rpm based device (Fedora/Red Hat/CentOS/SUSE…), just install it like a normal rpm package:
This will update your older installation like 7.1-r2 or 8.1-rc2 if you have.
On a deb based device (Debian/Ubuntu/LinuxMint/…), please use the alien tool to install it:
All files will be installed to the /android-8.1-r1/ subdirectory and boot entries will be added to grub2 menu. Reboot and choose android-x86 item from the menu to boot Android-x86. Alternatively, you can launch Android-x86 in a QEMU virtual machine by the installed qemu-android script:
Note Android-x86 running in QEMU and the real machine (after rebooting) share the same data sub-folder.
Remix OS for PC
Remix OS started out as a very promising Android OS for computers but the developers (jide) stopped maintaining it. However you can still download the software and check it out, although it uses the codebase of the old Android Marshmallow 6.0 version (based on Android-x86).
The taskbar of the system and right-click function is similar to Windows 10. Remix OS has a super easy installation process and you can utilize the system on an older PC as it’s easier to operate compared to Linux or Windows.
The hardware requirements are pretty low, with 2 GHz dual-core processor, 2 GB RAM and minimum 8 GB of hard disk space. It also works on both 32 and 64 bit systems.
Новости и улучшения Android 9.0 в проекте Android-x86
Прежде всего, разработчики обновили ядро дистрибутива с Android-x86 до Android 9.0 «Пирог»», включая все новости и улучшения, которые Google представил в своей операционной системе.
В дополнение к этому руководители проектов представили другие изменения и разработки в этой версии Android для ПК:
- Он совместим как с 32-битными, так и с 64-битными системами.
- Ядро Linux 4.19.80 с поддержкой LTS было включено.
- Он имеет аппаратное ускорение в Intel, AMD и NVIDIA благодаря OpenGL ES 3.x.
- Кодеки аппаратного ускорения для графики Intel HD и G45.
- Поддержка безопасной загрузки и установки через UEFI.
- Текстовый установщик с новым графическим интерфейсом.
- Поддержка тем в GRUB-UEFI.
- Совместим с мультитач, аудио, Wi-Fi, Bluetooth, камерой и различными датчиками.
- Позволяет автоматически монтировать USB-накопители и SD-карты.
- Панель задач была добавлена, чтобы приложения, которые мы используем чаще всего, всегда были под рукой.
- ForceDefaultOrientation включен для компьютеров с неизвестными датчиками.
- Поддержка нативных приложений для ARM.
- Это позволяет обновляться до неофициальных релизов.
- Добавить экспериментальную поддержку для Vulkan.
- Имитация адаптера Wi-Fi через Ethernet для улучшения совместимости с приложениями.
- Большая интеграция с виртуальными машинами.
Конечно, мы должны учитывать, что эта версия все еще является RC, то есть в ней все еще может быть ошибка или проблема, которая будет решена в будущих обновлениях. Но в целом RC1 полностью функционален.
Некоторые известные сбои в RC1
Его разработчики предупреждают о некоторых известных ошибках в этой версии операционной системы ПК:
- Сервисы Google Play иногда блокируются в 32-битной версии.
- Функция приостановки и возобновления не работает на некоторых компьютерах.
- Драйверы NVIDIA Nouveau иногда плохо работают.
- Поддержка ускорения VMware 3D не работает должным образом.
- Если Vulkan активирован, фотографии не могут быть сделаны.
Bliss OS-x86
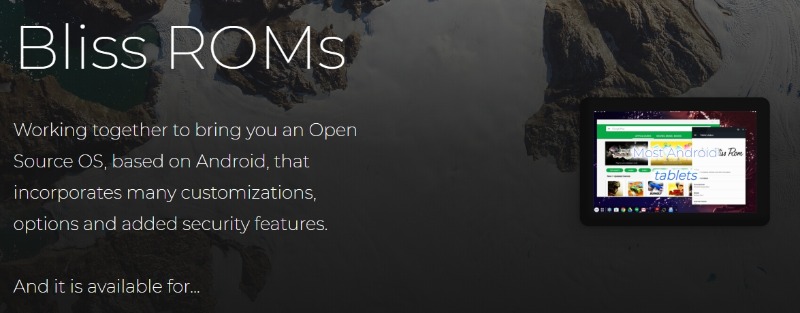
Bliss OS-x86 is an open source Android-based operating system for PC computers and tablets. Hardware wise, this Android OS flavor can be installed and run on any Windows/Linux PC, Chromebook, Macbook or Tablet released in the last 4 years (i.e 2016 and later).
The current version of Bliss uses the Android 9.0 Pie codebase and is designed to work with both the mobile systems as well as with desktop and laptops. The new Bliss OS 12 will be based on Android 10.
Their main focus of Bliss OS is to provide quality ROMs that can be installed on as many hardware platforms as possible. This can run on most of your devices, preserving customizations and options. The x86 variant is of course for Desktop PC computers that are equipped with x86/x86_64 compatible CPUs.
The User Interface can be configured as either Desktop UI or Tablet UI based on the launcher being used.
Save data to USB/hard disk
We provide several ways to save data to your disk. You can choose one of them according to your situation:
- Create a subdirectory named data in the /android directory. The user data will be saved directly to that directory. This method only works for ext4 partition.
- Create a file named data.img in the /android directory. The user data will be saved directly to that file. This method works for ntfs or vfat partition. Just boot to debug mode, then
then type ‘exit‘ or (ctrl-D) twice to continue booting.
- Create a separate ext4 partition and save data to it. You have to add DATA=<device_name> to the boot option. For example, suppose your data partition is /dev/sda2, then add DATA=sda2 to the boot option.
Debug Howto
This page explains how to use adb and gdbserver with VirtualBox
1. use adb:
• In the VirtualBox network configuration, it is simplest to configure it for Host-Only or Bridged.
• boot up Android iso image on the VirtualBox.
• setup ethernet (normally, it will do DHCP by default)
• find the IP address of the android VM, by going to the console <Alt-F1> and then typing: netcfg
• you can go back to the UI by pressing <Alt-F7>
• on you host machine, cd <android source code root directory>/out/host/linux-x86/bin/
• ./adb kill-server
• ./adb connect <VirtualBox IP address>:5555, after this command, you should see something like below
* daemon not running. starting it now *
* daemon started successfully *
connected to <VirtualBox IP address>:5555
2. using adb with a NAT’ed VM
• The steps above work nicely if you have a VM which is set up to use Bridged or Host-Only adapters
• However, if you have a NAT’ed VM you cannot connect to the VM IP from the host
• You will need to set up port forwarding for a host port to be forwarded to the VM port 5555 (which is adb)
• VBoxManage modifyvm <VMName&rt; —natpf1 adb,tcp,*,<localport&rt;,*,5555
• Example from one machine:
• VBoxManage modifyvm froyo —natpf1 adb,tcp,*,5555,*,5555
• Once this is done, you should see the local port (i.e. 5555 in this case) bound on the host via netstat -a
• You can now connect to the VM by adb localhost:5555
2.a using adb with KVM (qemu)
If you are using KVM instead of Virtualbox you may find the following useful.
Example of running a iso using kvm:
kvm -soundhw es1370 -net nic -net user,hostfwd=tcp::4444-:5555 -cdrom buildname.iso
adb connect localhost:4444
adb disconnect
-usb -usbdevice host:2.*
3. how to use gdb with gdbserver:
Android-x86 comes with a preinstalled gdbserver. And you can find it in /sbin/gdbserver. To use gdb to debug your process, you need to:
• set up host-only network as mentioned earlier
• in the terminal emulator, run su
• in the terminal emulator, run gdbserver <VirtualBox ip address>:1234 or
• on your host machine, run gdb
• gdb > target remote <VirtualBox ip address>:1234
• gdb > set solib-search-path <the path to all the shared library binaries>
• gdb > c
4. Stop zygote to run automatically:
in the vendor/asus/eeepc/init.rc, change following lines
service zygote /system/bin/app_process -Xzygote /system/bin —zygote —start-system-server
socket zygote stream 666
onrestart write /sys/android_power/request_state wake
onrestart write /sys/power/state on
service zygote /system/bin/app_process -Xzygote /system/bin —zygote —start-system-server
socket zygote stream 666
onrestart write /sys/android_power/request_state wake
onrestart write /sys/power/state on
disabled
oneshot
Testing
The generated image is located at
out/target/product/$TARGET_PRODUCT/$TARGET_PRODUCT.iso
You can easily test the iso file by a virtual machine like virtual box or qemu. Alternatively, on a Linux host you can use the qemu-android script (available since nougat-x86) to run android-x86 in qemu directly:
To test the image on a real x86 hardware, you can burn the iso to a compact disc (CD), then boot it on the target device. Check the manual of your vendor to see how to boot from a CD. On booting it will automatically detect your hardware and load necessary modules.
Since honeycomb-x86, we support the hybrid iso format. That is, the iso could be dumped to a usb disk directly. For example,
where /dev/sdX is the device name of your USB disk. The feature is available for all iso files released after 2011/12/25.
If you build an rpm file, install it to your Linux host and run the qemu-android script directly. Or reboot and choose android-x86 item from the booting menu.
For more details about how to use the iso or install it, see the installation howto.
OpenThos
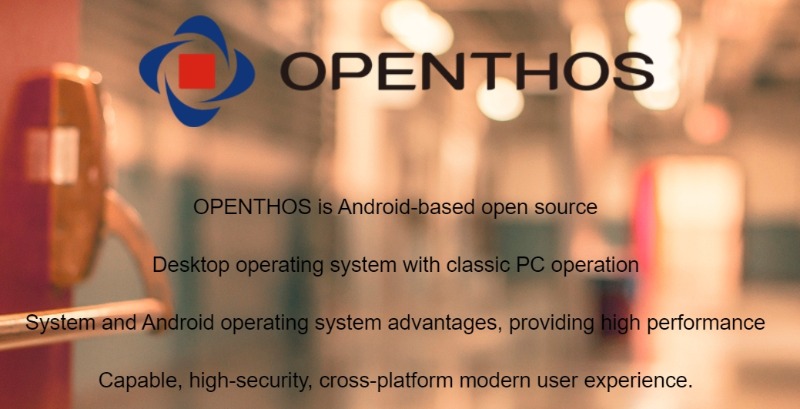
OpenThos is a relatively new Android operating system for PCs that lets you enjoy both Android and Linux applications side by side. The apps can be run on a windowed mode enabling you to multitask and manage several apps at a time.
It uses the Android Lollipop kernel and runs only on computers with 64-bit technology. You also don’t need to install any driver as it will detect your PC or laptop automatically. However, OpenThos doesn’t include Playstore so you need to get that from a third-party site.
Since this is a Chinese app, you will have some difficulty to download and install the OS. Also, there are not that many English instructions online.
Используем Android x86 для запуска на компьютере
Android x86 — известный открытый проект по портированию ОС Android на компьютеры, ноутбуки и планшеты с процессорами x86 и x64. На момент написания данной статьи актуальная версия, доступная для загрузки — Android 5.1.1.
Загрузочная флешка Android
Скачать Android x86 можно на официальном сайте
где для загрузки доступны образы iso и img, как настроенные специально для определенных моделей нетбуков и планшетов, так и универсальные (находятся вверху списка), сам дистрибутив весит 350 мб.
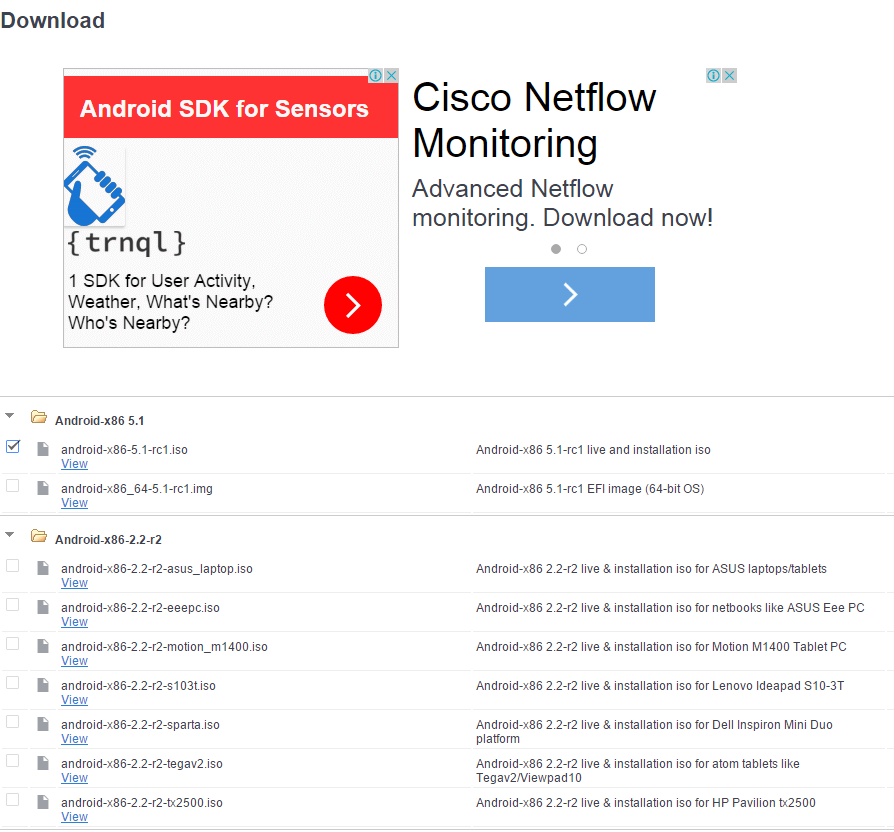
Для использования образа, после загрузки запишите его на диск или USB накопитель. Я делал загрузочную флешку с Android из образа iso с помощью утилиты Rufus, используя следующие настройки (при этом, судя по получившейся в результате структуре на флешке, она должна успешно загрузиться не только в режиме CSM, но и в UEFI). При запросе режима записи в Rufus (ISO или DD) выберите первый вариант.
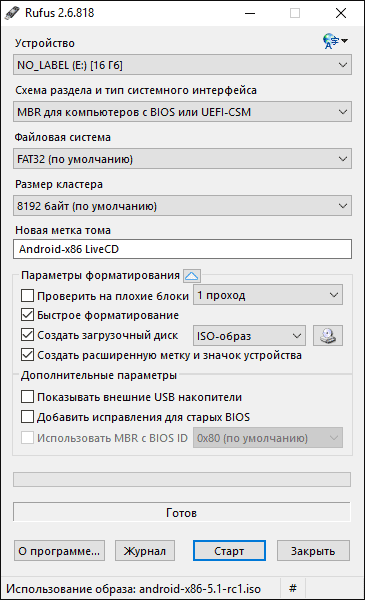
Для записи образа img (который выложен специально для EFI загрузки) можно использовать бесплатную программу Win32 Disk Imager.
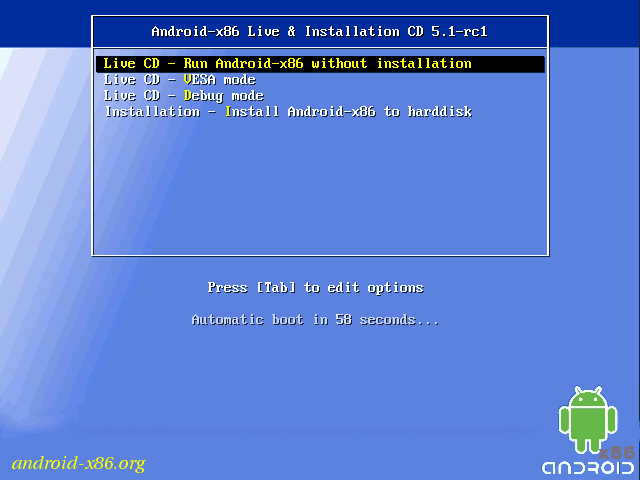
Запуск Android x86 на компьютере без установки
Загрузившись с созданной ранее загрузочной флешки с Android (как поставить загрузку с флешки в БИОС), вы увидите меню, в котором будет предложено либо установить Android x86 на компьютер, либо запустить ОС, не затрагивая данные на компьютере. Выбираем первый вариант — запуск в режиме Live CD (Run Android without installation).
Начнется загрузка, первое, что вы увидите это будет большая запись с названием системы.
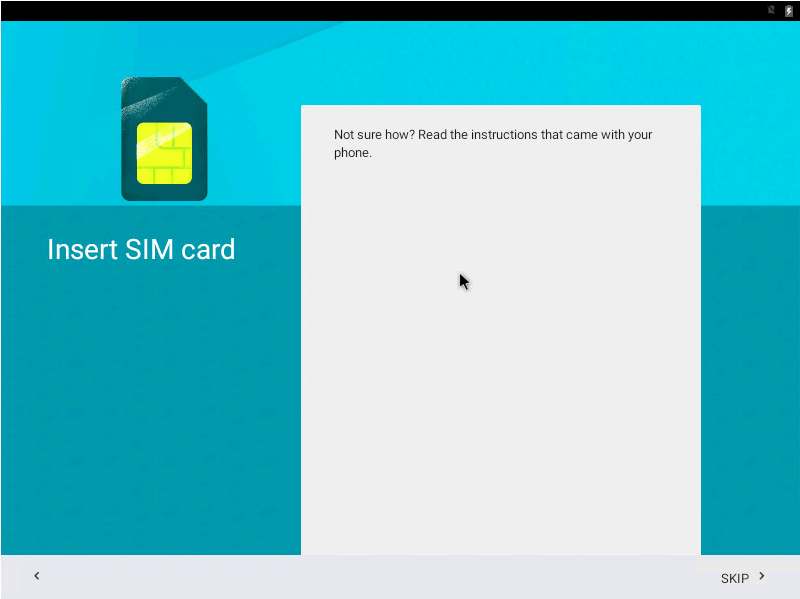
После непродолжительного процесса загрузки, вы увидите окно выбора языка, а затем — первоначальные окна настройки Android, у меня здесь работали клавиатура, мышь и тачпад на ноутбуке. Можно ничего не настраивать, а нажимать «Далее» (все равно настройки не сохранятся после перезагрузки).
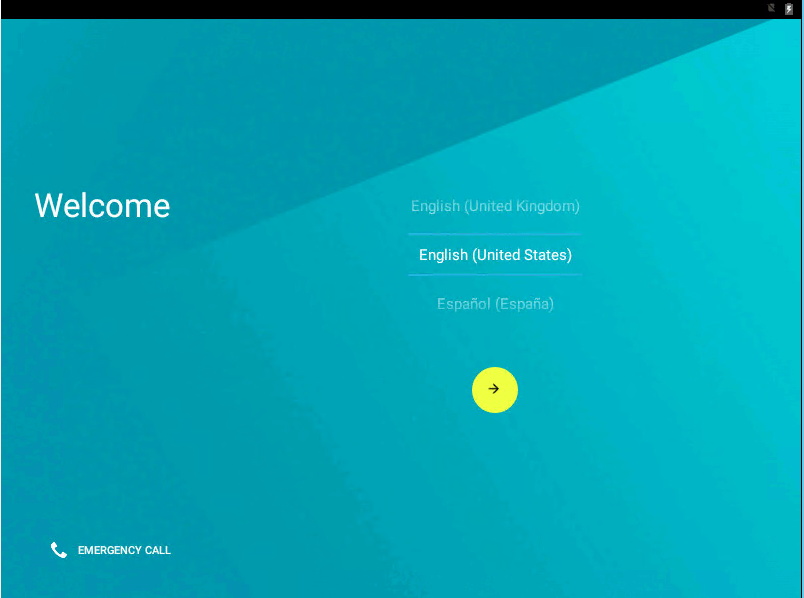
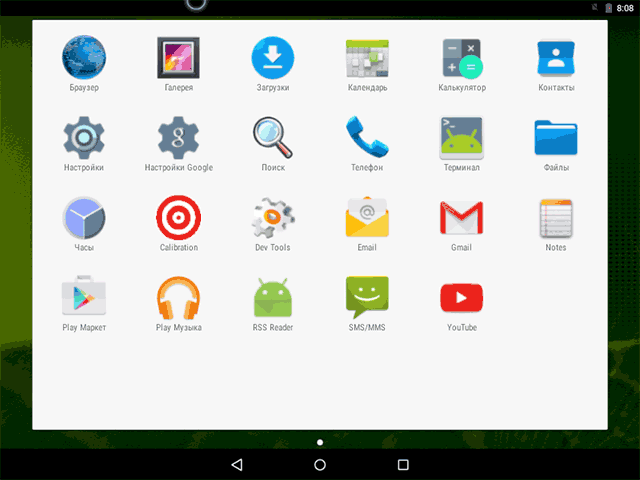
В результате попадаем на главный экран Android 5.1.1 (я использовал эту версию). В моем тесте на относительно старом ноутбуке (Ivy Bridge x64) сразу работали: Wi-Fi, локальная сеть (причем никакими значками это не отображается, судил лишь по открытию страниц в браузере с отключенным Wi-Fi, звук, устройства ввода), были поставлены драйвера для видео (на скриншоте этого нет, он взят из виртуальной машины).
Если сети у вас нет то просто пропустите ее в мастере.

Вот и сам интерфейс.
В целом, все работает нормально, хотя проверял работоспособность Android на компьютере я и не очень усердно. За время проверки столкнулся с одним зависанием, при открытии сайта в встроенном браузере, которое смог «вылечить» только перезагрузкой. Также отмечу, что сервисы Google Play в Android x86 не установлены по умолчанию.

Установка Android x86
Выбрав последний пункт меню при загрузке с флешки (Install Android x86 to hard disk), вы можете установить Android на свой компьютер в качестве основной ОС или дополнительной системы.
Если вы решили этим заняться, рекомендую предварительно выделить отдельный раздел для установки. Дело в том, что работа со встроенным в программу установки инструментом для разделения жесткого диска может оказаться сложным для понимания.
Далее я привожу лишь процесс установки для компьютера с двумя MBR (загрузка Legacy, не UEFI) дисками в NTFS. В случае вашей установки эти параметры могут отличаться (также могут появиться дополнительные шаги установки). Также рекомендую не оставлять раздел для Android в NTFS.
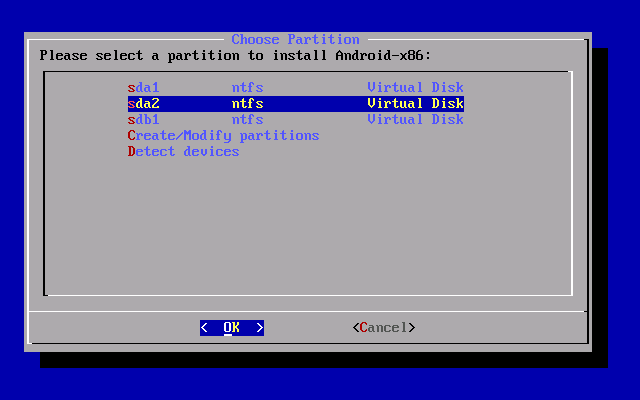
На первом экране вам будет предложено выбрать раздел для установки. Выберите тот, который заранее для этого подготовили. У меня это целый отдельный диск (правда, виртуальный).
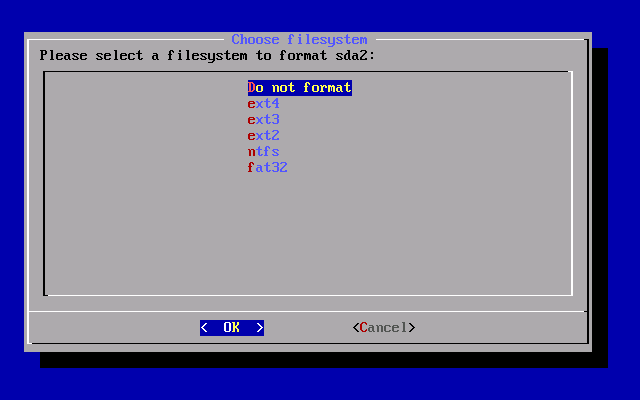
На втором этапе вам предложат отформатировать раздел (или не делать этого). Если вы всерьез намерены пользоваться Android на вашем устройстве, рекомендую ext4 (в данном случае вам будет доступно для использования все место на диске, как внутренняя память). Если вы не будете его форматировать (например, оставите NTFS), то по окончании установки вам будет предложено выделить место под пользовательские данные (лучше использовать максимальное значение 2047 Мб).
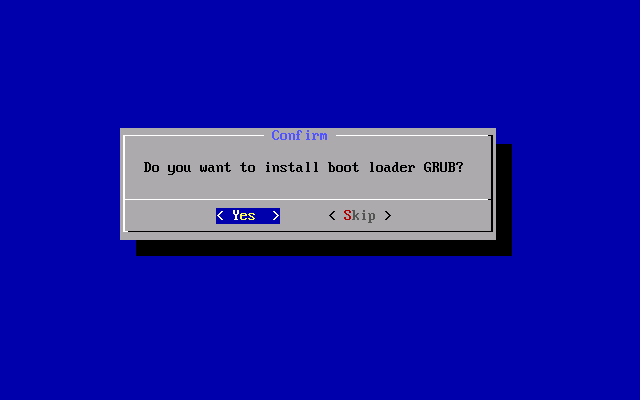
Следующий этап — предложение установить загрузчик Grub4Dos. Ответьте «Да», если у вас на компьютере будет использоваться не только Android (например, уже установлена Windows)
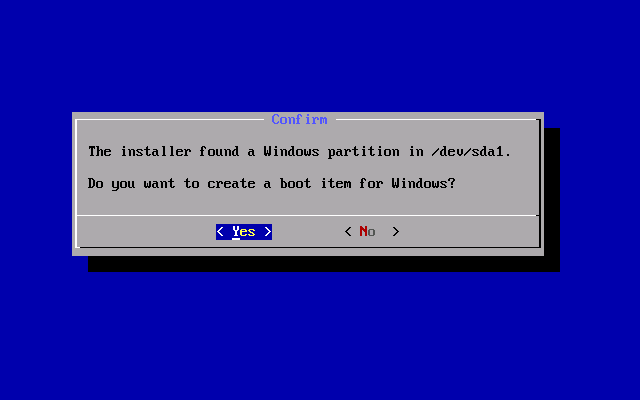
Если установщик найдет другие ОС на компьютере, будет предложено добавить их в меню загрузки. Сделайте это.
В случае, если вы используете UEFI загрузку, подтвердите запись загрузчика EFI Grub4Dos, иначе нажмите «Skip» (пропустить).
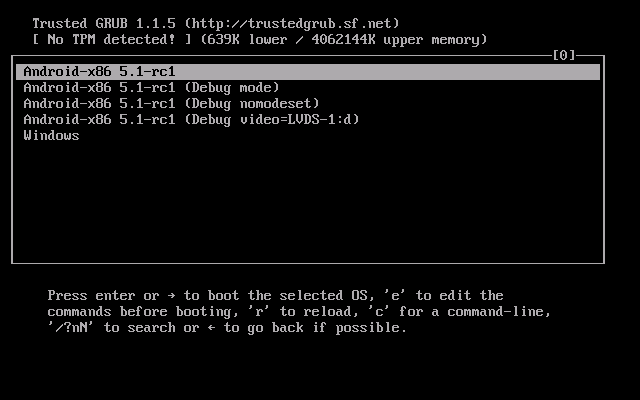
Начнется установка Android x86, а после нее вы сможете либо сразу запустить установленную систему, либо перезагрузить компьютер и выбрать нужную ОС из меню загрузки.
Готово, вы обзавелись Android на своем компьютере — пусть и спорная ОС для такого применения, но по крайней мере интересно.